Moving on from our discussions on marketing, we’re going to start looking at the last step in the publishing process. And that is publishing itself! Today, we’re going to focus on publishing with Amazon, but I’ll also talk about traditional publishing and some of the things I’ve experienced while working with an independent publisher, which is a third option that is slightly different from traditional publishing while still not being quite the same as self-publishing.
Amazon is probably the biggest platform authors use for self-publishing. Other sites like Kobo and paperback distributors like Lulu follow closely in Amazon’s footsteps, but when it comes to publishing both paperbacks and ebooks? Amazon is the best known platform for that. Unfortunately, it’s also one of the pickiest platforms I’ve worked with, and there a many little tips and tricks that most don’t know. Knowing how to get the most out of the system (extort it, if you will) usually makes the difference, at the very least, between making it onto the top 100 in any given category and dying in obscurity.
Lovely, right? Well, no matter how annoying Amazon can be, it has the largest reach out of the online retailers selling and publishing ebooks and paperbacks. So, we can’t ignore it even if we don’t much appreciate how ridiculous things can be. But, not ignoring it means that we have to learn the system if we want to be successful. By the end of this article, I hope to give you the major tools you need to do exactly that.
Publishing with Amazon’s Manuscript Requirements
To start, you’re not going to do very well if you can’t even get your ebook or paperback off the ground and onto the platform. Amazon has some seriously strict requirements for formatting. It’s quite frustrating at times. The time investment to get a nice looking ebook or paperback can be daunting.
If you’re going to do self-publish consistently and have a Mac, I highly recommend getting Vellum. It isn’t available for Windows users, so sadly, we’re all stuck spending a good eight to ten hours trying to get the formatting to look nice on Kindle. (I know because I go through it every time I have a new book to prep.) Vellum takes you twenty minutes once you’re accustomed to using it.
If you’re doing the work on Word, there’s a plugin Amazon created for Kindle that can be downloaded and installed for free. They also have a version for desktop that’s its own program for after you finish working in Word. That’s what I linked to above.
Whichever format you prefer, don’t waste this tool. Use it. It doesn’t make everything better, and you won’t get highly complex formatting. Images still won’t work so well, but if you keep things streamlined and simple, the tool is going to make your life way easier. You’ll have fewer revisions to make to your document before it’ll work right on Amazon’s platform and e-readers. If you need some guidance on handling ebook formatting, I go into that here. I won’t rehash that now since the post would get too long if I did.
A Word on Paperbacks
When it comes to paperback formatting, you can get a lot more fancy, but make sure that when you’re done, you “print” it as a pdf with fonts embedded and the paper manually set to the size your finished paperback will be on Amazon. For most fiction books, I’ve found that using a 5.25″ x 8″ size works very nicely. If you have a program that lets you print pdfs with special settings already, then that should allow you to embed fonts and change to custom paper sizes. But if not, I use Bullzip Pdf Printer for mine. I invested in the fully-featured version, which has been well worth paying a one-time fee to access the settings I needed.
Make sure you get a proof copy to check cover, page numbers, table of contents, and sizing of any images you included before you hit publish on the paperback. Ebook issues are easy to fix. Paperback ones are not! Fixing spelling errors on paperbacks or glaring errors that I somehow missed when formatting has been nothing short of a nightmare in the past. It is worth noting that Amazon allows you to reupload the manuscript and the cover after you publish, something I couldn’t do when I had to make changes to Bane of Ashkarith. So that’s a definite improvement. But some of the information you’ll enter for the book page can’t be altered, so it pays to make sure you’ve double checked everything to save yourself time and headaches later.
Pre-Orders When Publishing with Amazon
For ebooks, you have the option of offering a pre-order period to readers. This gives you time to build hype and to gain reviewers for when the book comes out (something we discussed in the ARC readers post). But it also gives you time to get your categories and other issues ironed out before the book is actually delivered to buyers. I recommend using a three to four month period for your pre-order, so plan your other activities to prepare in accordance with that if you’re going to stick with that pre-order time frame.
Once the book is off pre-order, the manuscript you uploaded is automatically delivered to the reader, though. Because of that, you want to be sure you upload the finalized manuscript before the deadline Amazon gives you in the book’s content section. Don’t miss uploading because it’ll create all kinds of issues! Be sure that what you’re uploading is also the version you want readers to get.
Publishing Paperbacks
Paperbacks don’t have a pre-order period, sadly. I suppose it makes sense as Amazon probably doesn’t want to or may not have a way to keep track of all the orders they’re going to have to print at some random date in the future. This means, however, that you have to plan more for publishing the paperback. You don’t get extra time to get Amazon to iron out the issues with your categories or other things. Once it’s up, you have to hurry to get it all done.
I recommend putting your paperback out around two weeks before the actual release date for your ebook. Rather, announce its release two weeks before the ebook’s. Publish it a few days before your announcement of its release and either email or call Amazon about switching the categories, something we’ll go over in a moment.
It’s important that you have those categories switched before you do a big marketing push using the new book’s purchase link. If you don’t, none of your sales will help your ranking in the new categories because they’ll have gone toward the old, generic categories you chose in the initial setup of the book. Just one more way publishing with Amazon gets tricky. But once they’ve confirmed that they switched the categories over or updated them, then you can start sharing the link and using it in the marketing avenues we discussed in previous posts.
The other reason you should release the paperback two weeks before the ebook’s release is because it allows you to give your ARC readers two weeks to post their reviews before the ebook comes out. Having reviews out of the gate on your ebook can make a big difference, particularly if you were able to hit the 50 review threshold that gets Amazon’s algorithms to kick in to help sell the book.
Categories and Publishing with Amazon
And now we get to categories, something I keep mentioning but haven’t yet explained. If you’ve already published a book or two with Amazon, you know what they are. But did you know that you can have Amazon change them to less competitive categories or that the ones Amazon gives you to choose from at the beginning represent only 20% of the possible categories (the most competitive ones, by the way)? Most don’t.
For the newbies in my audience, you’ve come to the right place to learn about this! I’ve gone through three or four books now with this process, so I know the potential pitfalls, the difficulties, and the best methods for getting this ironed out. To begin with, let me explain what the categories are so you’re not lost. If you already know, feel free to skip the explanation.
Categories are the various classifications Amazon gives to their books. That’s the simplest explanation. But to put it in terms that you’d understand as an ebook or paperback reader with Amazon… Categories are all those options in the sidebar that let you narrow down a search. You know. You can choose to look under paranormal romance or teen fiction in the ebook store or under everything. Or, you could go to the nonfiction header and select autobiographies from the list. Those are the categories, and authors choose them. Sometimes, based on keywords chosen, Amazon may place you into certain categories automatically, but they’re not foolproof, and often, this doesn’t happen properly.
Notes on Categories when Publishing with Amazon
You can have up to ten categories on a book you’re publishing with Amazon, and there is no reason to leave it up to chance. As I said, the two categories you’re allowed to choose when first setting up the book are only 20% of the possible categories and are the most competitive 20%, likely because most don’t know they can add more or change their categories. You know your book far better than Amazon does, and so, as long as the categories seem relevant based on the description, they’re not going to fuss about it, usually.
However, when you call or email them under your author central’s help tab/contact us, you should know a few things to make the process smoother. I’ve made these errors both at the beginning and even now when I’m moving too fast and not checking the email before I send. Let’s go over them.
Age group matters! You can’t select Teen and Young Adult categories and also ask Amazon support to apply Children’s categories. They don’t like it, and they will tell you no. I know, I know… Your age range is set for 12 and up. They don’t care. Your choosing children’s as a category doesn’t mean the same thing to them as it does to you. To them, children’s means little kids, juvenile means anyone from about 9 – 12. Teen is 13 – 18, which makes sense. And adult, obviously, is 18+. But in some ways, the method makes sense. Wouldn’t want you to be able to categorize a book for adults as a teen or children’s book just to get better rankings.
Ebook and Book categories are not the same. If you’re asking them to change the ebook categories, make sure it says Kindle Ebooks or something to that effect, not books. And vice versa with books. If it says ebook instead of book, Amazon will reply back telling you they can’t change the categories and to resubmit, which is a pain.
ASIN or ISBN is a must. If you provide the ISBN, just know that you’ll need to only give book categories since the ISBN doesn’t go with ebooks on their platform. ASIN can be provided for both types so long as you specify that you want to change the categories for the ebook, list them, then specify you want to change the categories for the print book, and list those separate categories.
This should go without saying, but make sure the categories are relevant to your book. If they aren’t, readers and other authors tend to get annoyed because you’re taking up space in a category that has nothing to do with your work. It’s a great way to get bad reviews from your audience. Don’t do it even if the category is less competitive than the ones relating to your book. If you absolutely must take advantage of the category, write a new book. But under no circumstances should you apply it to the old one that doesn’t fit it.
Finally, make sure you send Amazon the entire pathway for the category. This means you need to not just tell them Paranormal Romance, for example, but you should instead be telling them you want Kindle ebooks > Teen and Young Adult > Paranormal Romance. This is just an example, and this probably isn’t the actual category path, but the idea is, everything you have to click on to get to that exact category must be provided or they won’t change anything.
Tools for Category Research
Personally, I prefer to use Publisher Rocket to do my category research. It’s going to be the easiest route because it gives you the info on number of books sold to reach both #1 and #10 in a category along with the seller ranking of each book’s publisher (individual or publishing company). It keeps the information in one neat, tidy place and provides you with the exact path, which you have to provide to Amazon if you want categories changed.
However, if you’re not able or inclined to spend the money for it, you can do it manually. Search in Amazon’s search bar for something related to your book, select a category that fits well, and note down the Amazon seller ranking for the top 10 books. Then, take those numbers and plug them into KindlePreneur’s Kindle Best Seller Calculator. This will tell you how many copies a day each book must sell to remain at their current rank. You would need to sell at least one more copy than they are in a day to beat them and take their spot. You can also use BkLnk to see all the categories books similar to yours rank under to get ideas for categories that might fit your book.
Conclusion
We already went over covers, so I won’t go into a huge amount of detail about that. Just make sure that your cover artist has the appropriate dimensions for the paperback cover you want them to create. They should know to create a Kindle cover using Kindle dimensions, but if you have issues with getting it to load, it’s acceptable to politely let them know what the problem is and ask them to address it if you specified that you wanted the cover for Amazon’s Kindle platform.
At the end of the day, publishing with Amazon is more effort than people think, if you want to do it well, at least. It isn’t as simple as throwing up a cover and calling it done. You have to work at it and perfect it if you want to deliver a product that stands out to readers in a good way. And that is what you want to do, particularly since so many others are also publishing on Amazon. You need to differentiate yourself from them in a positive way! Hopefully this proved useful for you. If you have questions or further comments, please feel free to add to the discussion in the comments!
Now we come to a part of marketing that, for some reason, a lot of authors I’ve seen in my various Facebook groups seem to neglect. I have to say that authors on Twitter that I’ve dealt with seem to do well with networking as a part of their marketing. Authors on Facebook though? Anytime someone hosts a networking style event for readers and writers, I see the same faces and rarely anyone new. If you’re in the camp that, for whatever reason, avoids networking… Well, networking is essential, and connections are vital, so don’t keep avoiding it if you want to be successful. A lot of you may be avoiding because you don’t know how simple networking can be or where to start. Hopefully, by the end of this article, there won’t be an excuse left or a feeling of not knowing where to start.
Why Networking?
The simple answer? No business owner or business ever succeeded without connections, and networking is where it starts. Know anyone who got a new job because they knew someone who knew so-and-so, who knew the person in charge of hiring? Assuming you aren’t that person yourself, you probably do because it’s not uncommon for connections to give you a foot in the door and start the ball rolling. They might not hire you predominantly because of who you knew, but it sure doesn’t hurt anything.
Word of mouth and connections are powerful things. It starts with those in your network liking you and what you have to offer then telling someone else. And guess what? That’s exactly what your ARC readers are meant to do. But you find them through your network of other writers and readers most often, so if you don’t build that network, you’re at more of a disadvantage than you already were with Amazon’s strict review policies.
Simply put, you cannot operate in a vacuum. No one can. Not if they want to succeed. You need other authors on your team, and you absolutely need readers you’ve connected with to share their unique experience or take on your work.
Does Networking Work?
Those of you who’ve been reading the blog for a while know I like examples of the things I recommend or discourage. In the case of what I recommend, examples of success are preferable. This one is no different. I found every one of my ARC readers and most of my reviewers via my network. How? First, I let those I’d already connected with via social media or email know I was looking for help with reviews. Then, some offered to help, but many of my author acquaintances or friends just shared it. They didn’t have time to help me with a review, but some of their connections did.
Another way I’ve used networking is through groups on Facebook or threads on Twitter. It’s relatively easy to strike up a conversation or join in on one already started, and often, it leads to further connections. It might not yield a sale or a review right away, but my sphere still grows, and if I took the time to connect and then to keep the connection fresh, then it may convert to sales or reviews later–if not from them, then from their audiences if they share your content.
In the end, yes, networking works. But it’s not a get-rich-quick method. You won’t see results if you treat it that way. If you’re in it for the long haul to build your platform, though, then you must network, even if it leaves you a little less writing time.
Connections sell better than cold, hard pitches, especially in a virtual market where people expect you to do more to give them that sense of a real, genuine connection with you before they’ll buy what you want to sell them. They can easily ignore your cold, hard sell or get bored and move on. A connection lasts longer.
Handling Networking
Hopefully now you’re convinced you need to network, if you weren’t before. We don’t work in a void, so people are part of the process, particularly with marketing.
But now you may wonder… How do I network? It sounds hard. I don’t do well talking to people, and I hate selling people on my work. I don’t know what to say… The objections go on and on.
Let’s address a few of the more usual issues.
First, it’s not hard. Depending on what you do, it’ll take you more time than some thing, but in and of itself, the task isn’t hard. If you’re totally new to networking, start small. Join group on Facebook or participate in ones you’ve already joined. Or go search for different threads on Twitter under various writing hashtags and start interacting on there. Get yourself out there and start building those connections.
Second, if you don’t do well talking to other people… Well… Online does make it a little easier because you can think through what you send prior to sending. But in all honesty, you’re going to have to talk to others at some point. There’s no avoiding it. Just be yourself. If personal conversations make you uncomfortable, not to worry! Networking isn’t about being extremely personal or deep. You just have to be genuine, warm, and professional.
In fact, I generally advise you avoid deeply personal conversations online unless you know the person fairly well already or have good reason to believe they are telling the truth about who they are. It’s just basic online safety. Don’t share things like your address, your phone number, or any details that could give a clue as to where you live. (Obviously, if you’re using some newsletter softwares or other things, your personal information surrounding mailing address and the like may get out. So if you’re uncomfortable with that, I’d advise a PO box.)
Not everyone online is a creep, but there are enough of them out there to warrant being a little bit paranoid. Just be smart and avoid giving personal info unless there’s a very, very good reason to give it. The guy who’s been messaging for a week who just asked for your number? There’s no good reason to give it. Shouldn’t need to clarify this part on networking, but lots of authors and new business owners don’t seem to understand basic online safety or how to handle professional interactions.
We’ve all heard stories, but for some reason, despite hearing the stories, some people still make unwise decisions. Anyway, the point is be professional, stick to business-related topics or harmless conversations that don’t provide any private information, and use common sense. But don’t let talking to people or the chance of a bad egg in the lot ruin your attempts to network.
Third, you don’t know where to go or how to start… Social media. That’s what I’d start with. Like I said before, join some groups related to your business and your books. Talk with other readers and writers, and don’t be shy.
Fourth, you hate feeling like you’re selling something to people. On this one, the blunt truth is…you are. You’re going to have to accept that and move on. But, you can alleviate some of the feelings of being sold to and the frustration that can bring. It’s simple, really.
Unless they’ve asked you to tell them about your book or product and to sell them on it, don’t start off with it. Let it come up in the conversation naturally. Develop the connection so that when they see a post on a product you want reviews, buyers, or whatever else for, they’ll be more inclines to say yes. And, down the road, nothing wrong with selling to them–if you do it in a way similar to how you’d sell to a friend or a good acquaintance. Whatever you do, if you get the sense they wouldn’t like or find your product useful, don’t try to pitch it. That only frustrates everyone involved.
Conclusion
I’m hoping that answers the basic questions and issues regarding marketing. It’s really not as difficult as you may think. It can be as simple as getting on Twitter and replying to or posting a few Tweets. I try to do that regular, and I get a fair amount of interaction from people either in the replies or via a new follower. Building that connection is essential though, so if you’ve been avoiding it, stop now and work out how you can include it in your marketing plan.
Lots of like-minded authors looking to succeed are throwing release parties or author takeovers (where authors get time slots to post about their work) on Facebook or even on Twitter. They’re doing live videos on Facebook, Instagram, and YouTube. They’re involving each person who comes on board with their audience. You can too. You’ll have to show initiative and do the work for it, but while it might take time, it isn’t rocket science. So give it a chance and don’t discard this important piece of marketing just because it might be new or uncomfortable. And if you’ve been doing it for a while? Keep working at it. Find new ways to interact and engage with others to build your network.
That’s it for this week, everyone! I hope this has proved useful. Feel free to leave questions in the comments below if you have them!
On to the next topic in this set of marketing discussions. Social media. Most of us have it, though I know there are some who really can’t stand it and would rather avoid it. But, if you’re a business, you can’t afford to ignore social media since that’s where most of your potential customers and clients congregate. However, figuring out how to appropriately utilize social media for your business as an author can get confusing. We see how all the bloggers with other types of businesses utilize it for marketing their business, and we think: I can’t do that because it doesn’t fit my business.
And, you’d probably be right. As an author and a freelance editor, I’ve used multiple social media platforms and gone to a lot of different master classes via webinars or in person to learn more about marketing and social media. Problem is, a lot of the action steps given are hard to apply to authors. So, I’m going to share with you my perspective on it and what I’ve found seems to work for me.
What Types of Social Media Work Best?
If you’re like me, you’d rather not worry about every social media platform on the planet. Instead, you’d prefer to figure out what works and scrap whatever doesn’t. After all, unless you’re paying someone to do it for you, how much time do you realistically have to manage this? If you don’t do anything besides writing for your day job and you don’t have kids, maybe you have the time to learn and figure it out on your own while managing five different social media accounts. It takes time away from writing, but if you have time to spare, fine.
But most of us don’t have that kind of time. I work a 8-5 job, and while I may have lapses where I have nothing to do and can, therefore, check my social media or work on handwriting my next blog post, I don’t have a bunch of free time during the day. So, I come home, already tired, and I only have so much time to write and manage my social media pages before I need to make sure I go to bed so I’m not too tired to do it all over again the next day. Sound familiar? Throw in needing some time to go read a book for a review or just get away from work, and I don’t have the time to manage things that don’t work.
So, what does work? For me, I’ve found that I have the most success with Facebook, Twitter, and Pinterest. I rarely touch Instagram, though other authors have told me it works well, and I’ve not gone anywhere near SnapChat because I don’t have time for more platforms.
What Kind of Marketing Works Best with Each?
I find that Twitter works best for letting friends, fans, and prospective readers know what I’m up to throughout the day or for posting content I think will be helpful. I’ve had more success, on the whole, with finding ARC readers on Twitter and getting people to engage with me than I have on Facebook. People generally seem more engaged on Facebook, and I don’t have to go to random groups that will allow me to post my book link in order to hopefully gain some new readers. Lots of Twitter users will actually post things like #ShamelessSelfPromotionSaturday or #SupportIndieAuthors to ask for book links and new reads.
While you might not get any new readers from it, if you share it with your following and others are doing the same, there’s a better chance of your work being seen by someone than there is posting it in a group on Facebook where it’s going to be buried under thirty other similar posts within the next twenty-four hours (more if you’re unlucky).
What Facebook has on Twitter is the room to have a group to engage with your fans through playing games, doing author takeovers where other authors and yourself have scheduled time slots to post about your books and yourself as an author, sharing what you’re up to, and taking questions for Q&A type stuff. They make it far easier to do events where authors team up to bring readers new books, content, and even giveaways. Twitter isn’t set up for that because they impose a strict character limit on the tweets sent out and don’t have any way to easily organize everyone.
The Odd One In The Bunch
As for Pinterest? Well, Pinterest is the unique one out of the bunch. It isn’t technically social media, though you can use it similarly. Instead, Pinterest is a search engine. I like it most out of the three I use because it requires the least amount of activity. I can Pin one or two blog posts or writing prompts of my own and drive traffic to my blog, generate interest in my services, or guide people toward my books or others’ books that they might enjoy reading. But I don’t have to constantly post, try to run ads, or bother people asking them to share the content around.
It’s also nice that once you start to gain traction, Pinterest works with you. If your Pin is doing well in the related categories for search results, then they’ll put it higher up in the search so more people will see it. They don’t bury it, and those following the board or you will be notified of the newest Pin you created. Unlike Facebook, they’re not going to pick and choose whether or not to show it to the people who already said they were interested, and that alone makes it better.
If you’re looking for an easy platform to help drive traffic to your blog and to your products by extension, Pinterest is the way to go. Facebook and Twitter are far more time-costly than Pinterest to manage, and I’ve seen way less traffic to my blog from either as opposed to Pinterest. It’s worth learning the new platform. If you haven’t used it before, I’ve got some tips and will walk you through it in this post.
What Kinds of Marketing Content Work?
Obviously, this will be a little different for everyone depending on what sort of book you have and who you’re trying to reach. The starting point for everyone, however, is to know your audience. There are few directions you can go with social media to really build your brand: informative/expert in industry, humorous/light-hearted, a combination.
For Example… My Approach:
I’m not generally a very funny or light-hearted person. Unless sarcasm counts as funny… But most people would argue that poking fun at others isn’t the best way to build your brand unless satire is your brand. It’s not mine, so I went with informative/expert in industry. You can tell I have pretty easily because my blog and a lot of what I post on social media that isn’t related to my own books has to do with writing and editing. The content is geared toward educating and establishing the fact that I do know a thing or two about editing, writing, and publishing.
This was a choice I made before I even began the blog because I knew I wanted to appeal to both writers and readers of speculative fiction and, specifically, fantasy. As a freelance editor and an author, it can be hard to find an approach that will gain me new clients as well as new readers. This was my approach. It lets people know up front that if they come to me for editing or for advice of any sort on writing, I’m going to have an answer or I’ll find one that’s based on research and fact. Having this approach also has the added bonus of gaining me opportunities to guest post for things unrelated to my published books specifically. My article on Burning Embers Publications regarding editing and the other one regarding Pinterest are two good examples of that.
What Difference Does That Make?
To put it succinctly, a huge difference. My choice of approach affects the kind of marketing content I use. Granted, if I’m marketing my books, I’m probably going to market them about the same way anyone does (or wants to): with strong copy and information on how to get the book. But if I’m trying to market myself as an author, which is really what you’re doing whether you’re actively trying to sell a book or not, then my choice of direction changes what I’ll post about.
Sure, I post stuff that I just find amusing or interesting. But usually, those are shares or retweets of other people’s stuff, not my own marketing content. I strive to make my content reflect my goal: providing expertise on the industry and helping others to learn from what I know. Your content should do the same.
But Really… What Types of Marketing Content do I post?
For authors, it’s all about readers liking your writing and, ideally, liking you. It’s not just about them buying the book. It’s about whether or not they want to support the message you’re sharing. If they don’t buy into the message you’re trying to share, they’re not going to be very eager to share the work with others. But if they really like the book or series and your style and message, they’re going to be much more happy to tell all of their friends about you.
We all want to support businesses and brands that align with what we care about and the values we feel are important. If the content we’re reading, whether it’s on social media or in the book itself, doesn’t align with what we believe in and the core values we hold to, we’re not going to pass it along to others. Why would we? As a business, it’s our job to know what our message is and how the audience we’re targeting will perceive it. Then, we have to take that information and find a way to package it so that it’s interesting, palatable, and engaging for our target audience.
It’s like I said at the beginning. I can’t tell you exactly what kind of content will work for you because every individual brand and author will be different. But I can tell you that if you know your goals and the approach you want to take, you’ll be able to discern what content will fit that and post only what does. It’s not easy, but it is pretty simple.
Final Notes
Navigating social media is difficult. It poses all kinds of nuances, potential trip ups, and points of stress. Some people find it easier than others, but at the end of the day, none of us can avoid it if we want to utilize all the marketing tools available to us. If you know the angle you want to take and have goals to accomplish, it’ll make your journey easier.
In the end, my best advice regarding social media and marketing is this: be professional. That’s the number one thing you can do for your brand, no matter what direction you take. No matter what you’re posting, be professional. Act in a manner that is courteous, treat people with respect even if they’re not giving you that same courtesy, and make it about your reader and your audience, not you. It’s fine to talk about yourself and let them know you need help, but make sure that more of your content is focused on what they’re wanting and needing than it is on what you want and need from them.
This will go further than just about anything else in any area of your life. Treating others in a manner that’s kind and professional puts out a lot of fires. I’ve watched what happens when someone’s upset and the business or individual treated them with disrespect, condescension, and lack of compassion. It’s not pretty, and it doesn’t achieve anything except giving your business a bad reputation. It isn’t worth it. If you need to, scream about it away from the computer, phone, or person. But don’t let your frustration or anger out on them. Be polite and kind to a fault even if they’re not.
Conclusion
Professionalism and courtesy should be obvious parts of your marketing and branding strategy, but I’ve seen so, so many people screw this up, and it can make the difference between failure and success. Don’t let it be the reason you fail in your marketing and business goals! Use the tips I gave for platforms and content, and then add professionalism to it. You’re going to get much better responses from people that way, I guarantee. Best of luck to you in your marketing endeavors! Next week, we’ll talk some about your blurb, Amazon sales pages, and attracting readers.
Marketing is a really broad topic. If any of you have ever done a Google search on tips and tricks regarding this topic, then you know the results seem to be endless. Everyone has a different opinion. My goal here, as it usual, is not to give you my opinion, primarily, but to offer you the options and give both the upsides and the downsides of both.
But because the topic of marketing is so vast, I’m going to break it down, and we’ll have a few posts on the issue. Today’s is going to center around the issue of building your email list and fan base. We’ll have some discussions about social media in a later post, and you can also see what I have to say about Pinterest now if you’re interested in starting in on that right away.
An Indisputable Fact About marketing
Here’s the one thing that will always be true about marketing. It will go hand-in-hand with publishing no matter what you choose to do. I don’t care if you’re indie-publishing with Amazon or going through a small publisher or even going with a big brand publishing company. Marketing is a must. Now, depending on what route you take, you may not need to do a lot of your own marketing. But as an author, you are always going to be interacting with fans, old and new, and striving to increase the visibility your book has.
If you rely on a company to do it all for you, you’re not going to do as well as you would pitching in. After all, you’re the writer, and people who are fans of your work want to talk to you, not your publisher. So you have to know about marketing, which is why we’re talking about it in regards to publishing.
A Launching Point
Everyone needs a launching point as an author. If you’ve been doing this for a while, you’ve already found and used yours. You’re moving on to finding new and better ways to do things. But if you’re new… Well, chances are you’re feeling overwhelmed and have no idea where to start. Even if you’re not new, there’s a chance you’ve overlooked this crucial launching point for authors in marketing.
To those who are new, let me just say… Take a deep breath. You’re going to be fine. You’ll make mistakes along the way, but that’s fine. We all have and still do. You’ll have to if you want to figure out what works. The good news is, in this day and age, there are lots of people who have done it before you and have figured out what works. And those people have an easy avenue to share about it online. You wouldn’t be reading this if we didn’t.
So, what is the starting point? In marketing, your starting point should be an email list. Social media is fine and all, but you don’t control that. If you’re locked out of the account for some reason and can’t get in, you’re not going to be able to engage with your audience there. The same is not the case for an email list. You own that, and you can send content to subscribers at any time. As long as you’re not doing anything sketchy or illegal, you won’t have to worry about being shut down.
As such, this is your starting point.
How Does Marketing Work With An Email List?
Glad you asked! For authors, there are lots of choices for marketing to an email list and for marketing to potential subscribers. The thing that seems to work the best for me is to offer free content of some sort or to give away a coupon that discounts one of your books (if you have your own website and a connected store).
Attracting New Subscribers
This is the concept of having a lead magnet. You have to give something to get something. In this case, no one wants to give up their email address if they’re not getting anything useful in return. The possibilities for a lead magnet are endless. I’ve offered coupons (as I mentioned earlier), completed short stories that are only available free to new subscribers, and free previews (the first few chapters) of books. Sometimes, I’ll offer both the free preview of a book and a coupon to go with that book, but it all depends on how I’m doing things at any given time.
If you haven’t started an email list yet, your lead magnet and choosing a platform to use for the mailing list is your first priority. You don’t have any subscribers yet, so you’re not going to be too worried about what content to send. But, once you start getting subscribers, content is a concern. So, let’s chat about that next.
Marketing to Current Subscribers
This one’s a little more work. A lead magnet is done once you have it up. You do the work up front to make it the absolute best it can be regardless of what you’re going to offer. But once the work is done, it’s done, and you don’t have to repeat it.
Marketing to the subscribers you have is harder. The goal you have is to make sure that you know your audience. Who are you trying to talk to?
Let me give you an example. I’ve talked before about who this blog is aimed towards, but for those who weren’t with me for that post, I’ll review. My goal is to provide writers with content that is professional and coming from a position of expertise. If I don’t know something, I go research it before I decide to talk about it. I make sure I know what I’m talking about.
But, I also target readers. I’m an author and a freelance editor, so my goal is to not only establish my credibility as an expert in my field but to also give the readers in the crowd something they can enjoy. That’s why I do book reviews. It’s my way of sharing books I love with other readers. At the end of the day, I’m an author and editor, yes, but I was a reader first, and so I like connecting with my readers and with others who just enjoy a good book like I do.
I take that same approach when dealing with my newsletter. The content targets both my readers and my writers. You, if you figure out who your target audience is, can do the same thing. And your goal with your lead magnet is to make sure that free or discounted content attracts people who will actually want to look at your emails.
Why Does Target Audience Matter?
Okay, story time. When I first started my newsletter and got my lead magnet set up on StoryOrigin to start attracting newsletter subscribers, I offered a short story for free. And I got a lot of subscribers. But here’s the problem… I was losing five or six every time I sent out a newsletter.
My newsletter only goes out once a month right now because, a) that’s all I can manage and b) if my audience is anything like me, once a month is fine but more than that is a nuisance in an already full inbox. I tend to unsubscribe if I’m getting emails every day or every week, and I’m less likely to buy anything from someone I feel is spamming me with content. So, I just don’t do that.
But, apparently, for the people I was attracting to my audience, one email was too much. Now, there will always be people who sign up just to get the content you’re giving away and then unsubscribe, which is why I prefer to offer coupons or discounts instead. And there will always be people who sign up and, despite your best efforts, seem to expect something from the newsletter that you never advertised. It’s good for those people to go so your list isn’t cluttered with people who have zero interest in your content.
Avoiding Freeloaders and Zero Interest Subscribers
If you’re filling your list with people who just want free stuff and have zero interest in what you have to offer, then the moment you send a newsletter that talks about a new release or markets any of your products to them, you’ll lose them. I’ve watched this happen with my newsletter before, and it’s not only frustrating, it’s disheartening. You can’t stop it from happening entirely, but gear your reader magnet or lead magnet toward those who have an interest in what you have to say.
That’s why it’s crucial you take the time to figure out your target audience and how you want to approach marketing. Your marketing strategy will be very different if you’re trying to establish expertise in your field versus trying to entertain your audience.
Now What?
So now you know why you should be building an email list and some strategies for making the process smoother. But now what? Where do you go? What email providers are best? Can you do it for free?
No one platform ever fits every person. As a result, I can’t tell you which platform you’ll like best. Usually, you can start a free account and have what you need to get started. Therefore, as long as there’s an option to export your list of emails if you choose, you can try something else and find what works.
I’ve chosen to go with MailChimp. It integrates with my website’s store and other platforms well, and I don’t have to pay to get that feature. Since I don’t pay, I can say that it’s a little limited on what it can do at times. I can automate welcome emails and organize the email list as I wish, but I can’t schedule emails for future dates. Instead, I write the email, save it, and manually send later. A little inconvenient, but it gives a lot of features that other platforms don’t always give, so no complaints here.
Options for Integrating Your Email Subscription Provider with Lead Magnet Sites
On this one, I also found that MailChimp is easier to find integration info for. However, the two sites I use for lead magnets do support other email list sites. I’ve liked working with StoryOrigin best for gaining new subscribers with lead magnets. They seem to have more options for joining promotions with those lead magnets than BookFunnel. However, BookFunnel also has options and has more ways to control the delivery of ARC copies than StoryOrigin does. However, you do have to pay a monthly (or annual) subscription fee. So if you’re looking for free, StoryOrigin offers quite a lot for being free software.
Conclusion
Well, that’s all on marketing for this week. Next week, we’ll go into some other areas of marketing that you’ll need to give your book its best shot at publication. I look forward to having you all join me!
The third stop on our discussion of preparing for publication is finding ARC readers. To start off with, for those who don’t know what ARC readers are, they are advanced review copy readers. They are not beta readers and shouldn’t be considered such. Instead, they are readers who read the book before it’s out for the public and review it on release date. So let’s talk about how you get them and where.
Where to Find ARC Readers
The first step is finding your ARC readers. There are many places and ways to do this. First, you can use sites like StoryOrigin and Bookfunnel to join promotional events for reviews run by other users. On sites like these, people sign up for your ARC copy, and you approve them. Recommendation here for these platforms… Pay attention to the stats. I know you want reviews, but don’t just accept anyone. Look at the stats if they’re provided and approve reviewers who have decent stats and reputations for following through with reviews. I learned the hard way that if you approve people with no stats or bad ones, your risk is very high that you’re just giving away free copies of your hard work in exchange for nothing at all.
The other possible places to find reviewers are social media sites, writing forums that allow you to post about that kind of stuff, and through family connections. A word to the wise on family connections, though. Family members and close friends can review the book, but not on Amazon. If they do and Amazon catches the connection, you could lose all your reviews and both of you could be banned from reviewing. Not good news, so don’t mess around with this. If family members or friends want to review, have them do so on platforms like Goodreads and Bookbub.
One other avenue is by reaching out to the readers on your newsletter. If you’ve done a good job building your list, then there should be at least some who will be happy to help out in exchange for a free copy of the book.
Dealing with ARC Reader Deadlines
The next thing to consider is your deadline for ARC readers. Some people read faster than others, and you want to make sure you leave enough time for even slower readers to make it through the book before your release day. I recommend giving them roughly a month to read it. The best scenario is that everyone is able to finish and reviews on time.
Of course, we all know the best scenario is rarely what occurs in every case. You’ll have readers that don’t do it on time and need to be followed up with. If you acquired your ARC readers via social media or your newsletter/email list, you should know how to get in touch. The problem that I run into all the time with getting ARC readers through StoryOrigin and similar sites is that people’s emails and contact info aren’t given to you until the reader has actually submitted reviews (showing interest, therefore, in your work). This means you have no way to get in touch, and while the sites remind them to submit their review links and review, they can ignore that. If they do, there’s nothing you can do, and you can’t even contact them yourself.
What to Do If They Don’t Review
Unfortunately, there’s not a lot you can do. If you have contact info, you can get in touch and try to find out what’s going on. You can encourage them to leave the review and kindly remind them about the deadline for the review. But if they still don’t review, you can’t force them to do so. You want to keep relationships good and stay as professional as possible, so don’t be abrasive or too pushy about it.
If you don’t have contact information, there’s nothing at all you can do. You just have to wait and hope that the site your reviewer applied through will succeed when they try to remind them to review. Without contact information, there aren’t any options open to you if they don’t fulfill their end of the deal. That’s the risk you take. This is why you should look at the stats on how often they reviewed in the past to try to find reasonable assurance that they’ll review.
Bottom Line on ARC Readers?
The bottom line is that your new release needs reviews. Amazon’s algorithms won’t kick in to help you sell the book until you have at least fifty 4-or-5-star reviews. The only way to get a good start on that is to have reviews when the book comes out, and you can’t get those without ARC reviewers. Do your best to screen the people you’re giving the ARC copies to, and if you can, try to have contact info for the majority of reviewers promising a review on release date. I can’t promise you’ll have 100% participation, even though you should if you swapped a free copy of your book for the review promise, but at least if you can follow up, you’ll have a better chance of getting the reviews you were promised.
Okay, this won’t be a terribly long post since the only covers I tend to do are the artistic, silhouette-style covers you see on some of the re-covered classics. You know, the ones with the flowy, decorative fonts and more of a focus on shapes and color than fancy Photoshop skills. So I’m not really the person to talk to if you want to a lot about cover design like you see on most books. And that’s not the focus of this blog anyway.
But, if you’re an author, you do have to know how to handle your cover. It’s the very first thing a reader sees, and readers do, unfortunately, judge a book by the cover. This can be turned to your advantage, but only if you’ve gotten a designer who designs or have yourself learned to design cover art that’s a match with the genre and the feel of the book. If you haven’t… Well, your cover may send the wrong message.
The main things you need to know about cover art are as follows:
Designers are not one-size fits all.
You must own the image rights.
You want the cover to fit the genre: the goal is not to necessarily stand out but to fit in while giving readers a general idea of what your story is about.
Designers Are Not One Size Fits All
This is pretty straightforward. Not every designer will be a match for your project. Make sure you do your research. Look at what they design and the artwork they’ve done for other covers. If you can, talk to people that have purchased for them or read reviews left on their work. Ask for samples.
Most designers have a style they stick to. Their covers are going to feel somewhat similar just as paintings from a particular artist will feel similar when you look at them. A Van Gogh, for example, looks far different than a Leonardo Da Vinci. We can pick up on those styles of each artist and differentiate between the two. It’s similar for a designer. You can tell if someone’s being honest about the work they’ve done by looking for those similarities in the designs. If their work is all over or has some designs that are way, way different than anything else in their portfolio, be careful about it. They may be using other people’s art. Just be smart, basically. Do your research and take your time because your cover can really do a lot for the book.
You Must Own Image Rights
I don’t care what images your designer uses, you need image rights. If they create the piece entirely from scratch, which some do, then you get the rights when the artist is paid and gives you permission to use the art they created for the cover as they created it. But this means you need a piece that, from font to background image, needs to be entirely 100% owned by the artist. Otherwise, things get trickier.
If your artist didn’t create the image and the font 100% on their own, you need to own rights to images for use in that way. Places like Unsplash, Pixabay, and Pexels that offer free stock photos with Creative Commons zero licenses (use them basically for anything with no attribution) aren’t reliable. There have been issues I’ve seen occur in groups where artists used their images only to discover that the image was originally not the poster’s image and, as a result, the artist was in trouble for copyright infringement. It’s serious, guys. Don’t use these sites. Invest in a subscription for a year to a place like Envato Elements or buy individual stock photos from places like Shutterstock or Adobe Photoshop if you’re not going to require your artist to do the work to get images that you’ll have rights to using in your cover. Same deal for the fonts. If you’re in doubt on the fonts on what you can use it for, ask the designer. Free for commercial use may not always extend to ebooks or covers (As dumb as it is), so make sure you check with the person who’s listed as the creator. At least that way, with a written paper trail, you can say you did your due diligence to make sure you weren’t infringing on copyright.
A Cover That Fits the Genre
Lastly, make sure your cover will fit the genre. Make sure your designer does good work within your genre too before hiring them. You aren’t looking for something that will be super unique. Only something that draws the reader’s eye and gets them to click on the blurb. And, ideally, you want those people drawn in to be your type of reader. If you write dark romance, you probably aren’t too focused on drawing in fantasy readers unless your dark romance is set on another planet with elves and dwarves. Same goes for the reverse. I, as a speculative fiction writer, am trying to draw in speculative fiction readers with my cover not readers looking for a light, feel-good romance or some other genre.
So it’s important that your cover fits the genre and then, if you can, try to incorporate some aspect of the book. It can be a vague representation, but having a little bit of something to give your readers a general idea of what the book will be about helps with marketing, so don’t ignore the boost it can give your book.
Conclusion
That’s all for today, everyone! I hope this has been helpful to you. See you next week on Thursday Technicalities to discuss more topics from our current discussion on publishing preparation. Stay safe with all of the craziness currently going on with this pandemic. Until next time!
We’re taking a break from our discussions on publishing to talk about Pinterest today. Mainly, the focus will be on Pinterest for authors. This was a request for a guest post over on the Burning Embers blog. It’s up over there today as well, so check their blog out. They’ve got lots of useful tips for authors and writers. Their topic this month is marketing for authors. Let’s get started!
I’ve talked to quite a few of author friends who are sitting in front of their computers hemming and hawing about whether or not they need to be using Pinterest. If that’s you too, let me make this super easy! I mean no offense to anyone by saying this, but you should be using it! No two ways about it, you should. If you aren’t, especially as an author who has plenty of graphics and covers that would fit right in on the platform, you’re missing out.
But, Ariel,
you might think. I have no time to add another social media platform. And if
that’s you, you’re in good company. You’re also in good company if any of the
following excuses have crossed your mind in reference to Pinterest:
1) I don’t
know what to post.
2) I don’t
know how to use the platform.
3) It’s
social media, and I really dislike using that any more than I have to.
4) It’s time
consuming and maybe it costs something?
5) Any
other excuses to procrastinate. I’m sure someone else has also thought of them
even if I haven’t.
Answers to the Questions and Reasons Why Not
Okay, the
sarcasm and joking aside, I get that people have a million reasons not to
start using Pinterest for their business. But let me answer some of those
concerns right up front before we dive into how to get started, what you can
do, and what you need to be doing.
1) I
don’t know what to post. Well, by the end of this post, you’ll have some
great ideas for things you can do, so this will no longer be a problem.
2) I
don’t know how to use the platform. Also not going to be a problem when
we’re finished here.
3) It’s
social media, and I really hate using that more than I have to. False. It
is actually a search engine, not social media, and you get to use it for free
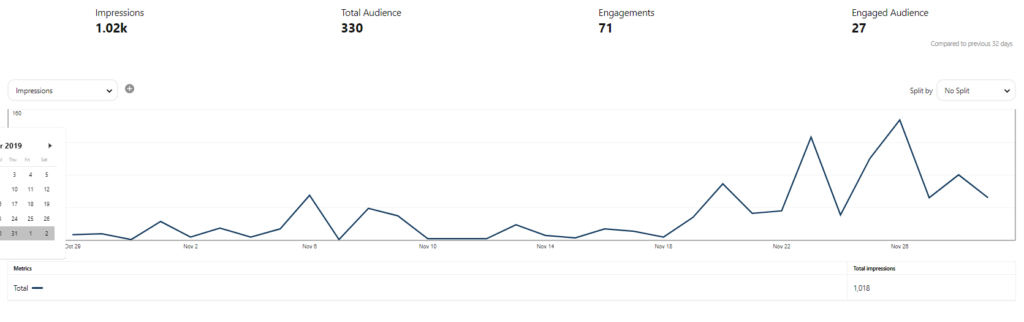
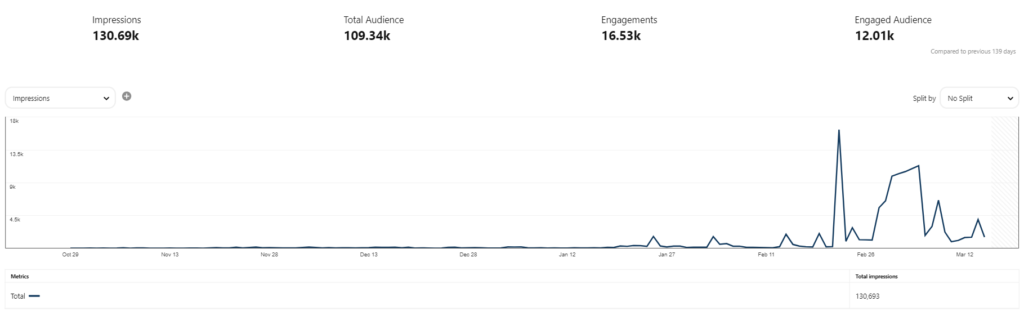
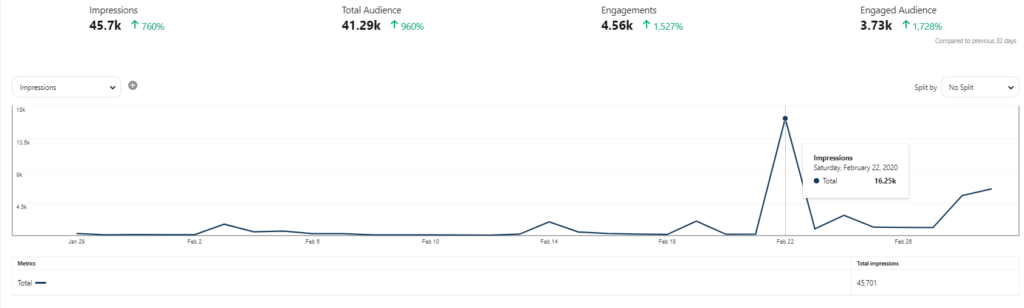
along with all the analytics tools that come with search engine optimization
(SEO) on the site for free! Yup, you can stare at the pretty line graphs and
see your traffic go up and down, see your viewer demographics, and track link
clicks and so on. But I’m getting ahead of myself. My point is, this is not
social media, and you should not be treating it as such. If you do, you’re
shooting yourself in the foot from the start.
4) It’s
time consuming, and maybe it costs something? No, it is not time-consuming.
I mean, sure, it’s going to take you some time if you choose to go the entirely
free route because you’ll have to manually upload the post, but it takes maybe
five minutes tops once you know what you’re doing, so that’s less time than it
takes to write the average blog post or even some Facebook posts. You could do
it on your lunch break. As for costing something, it doesn’t if you’re not
paying for ads and you post your own content. And, most importantly, it is not
pay-to-play like so many other sites, so you can still build traffic and
succeed without paid advertisements if you’re smart.
5) Any
other excuses you can come up with? Since I don’t know them, I can’t
guarantee I’ll give you a reason not to procrastinate, but by the end of this
post, I’m hoping you’ll be fully convinced that you should be doing Pinterest
even if you’re not doing much in the way of other social media.
Who is Pinterest For?
Let’s start
with this. Who’s on Pinterest? Well, hopefully your ideal reader. But let’s
just break it down to something simpler. Lots of people are on Pinterest.
Varying age groups are on at different times during the day, and they’re all
looking for different things. But mainly, Pinterest attracts people who are
doing a few things:
1) Shopping
around to figure out what they want to buy for any given type of product
(decor, books, electronics, you name it)
2) Looking
for amusement because they’re bored (so maybe they’re looking at humor, book
reviews, DIYs, or memes)
3) Looking
for information (They want to know about something or how to do something, and
they’re looking for free blog articles or graphics explaining how)
4) Needing
inspiration for a project (painting a new room, decorating their house,
planning a wedding, writing a book, and anything else under the sun)
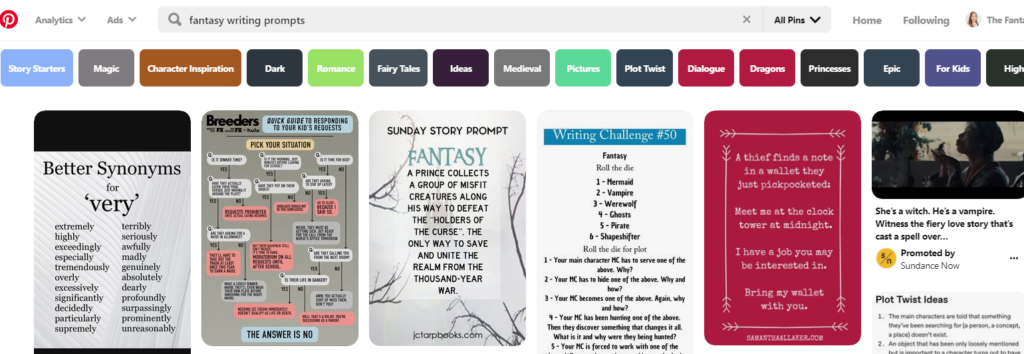
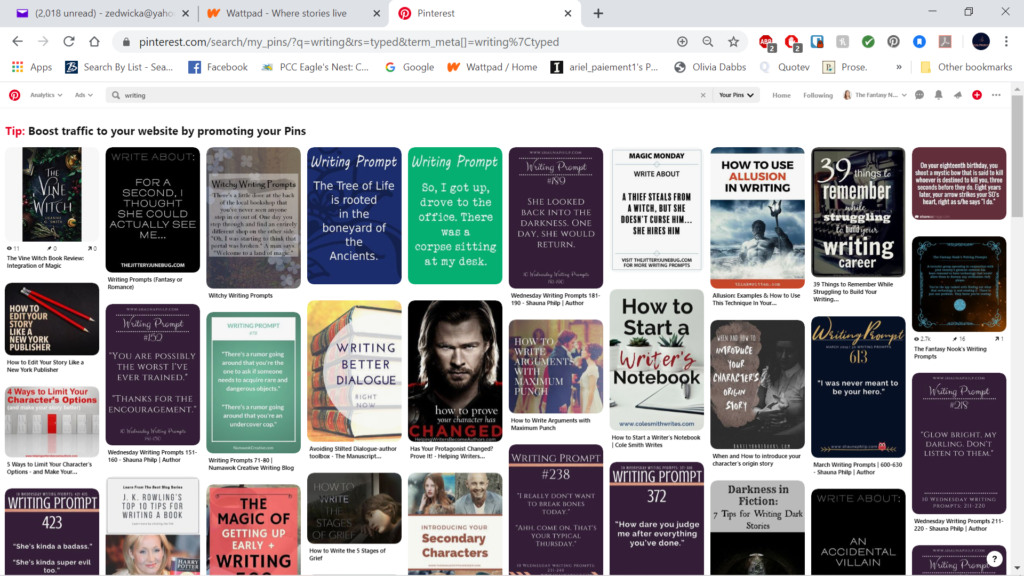
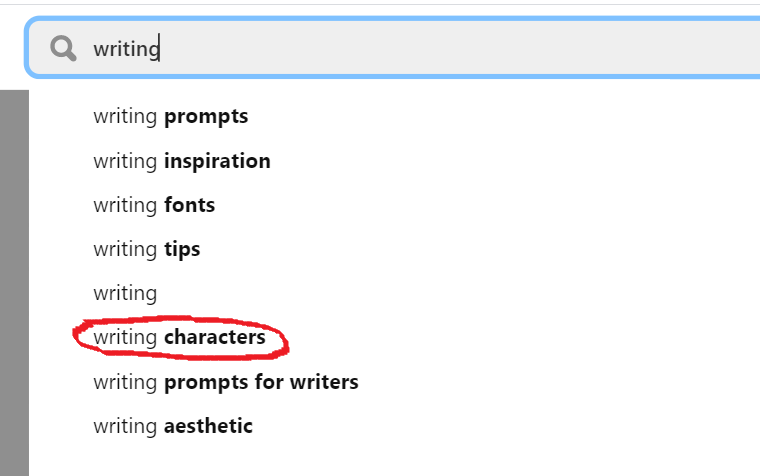
Why is Pinterest great for these? Because it’s a search engine in a visual form. People see Pins, which is just another word for visual search results created by Pinterest’s content creators (aka me and, hopefully, you too soon). If they look under the Pin, they see the title and maybe some basic information. Let’s take a look:
I’m a
fantasy writer, so I looked up fantasy writing prompts. The image above shows
all of the results that fit into the screenshot when I took it. Notice that
some have titles while others don’t, but all of them have some kind of visual
that lets you know what it is. You shouldn’t need the title to figure out what
you’re looking at in most cases. So if I’m looking for inspiration for a
project, for example, maybe I choose the third result: Sunday Story
Prompt.
Now that you
understand who is on Pinterest and why, let’s move on to understanding how
people move through the site and how you can use it to gain traction for your
blog!
Understanding the Site Layout
You’ve
already seen how to search for things in that first screenshot, and we talked a
little about why it’s such a useful way to search. Your viewers can figure out
if your content is something interesting to them without even reading the
header in many cases. Not that you don’t put a header in, since that helps to
improve search results and pop your Pin to the top of the results page when
certain keywords are hit. But they shouldn’t need it to have a general idea of
what the Pin is and to be drawn to looking at the Pin further.
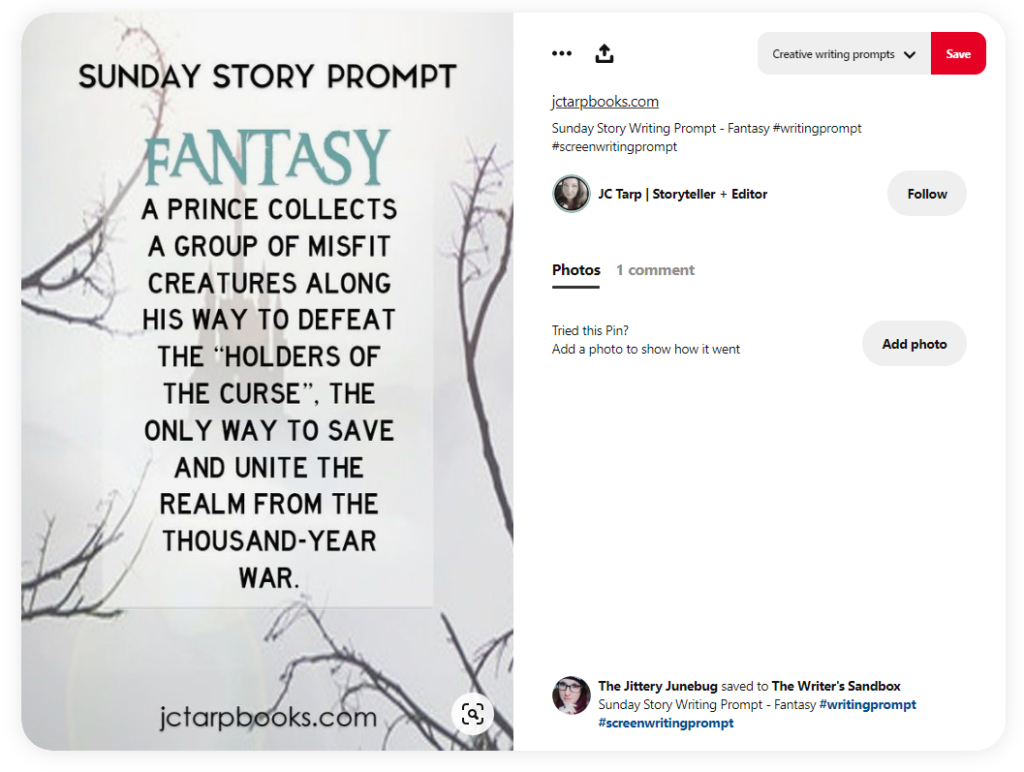
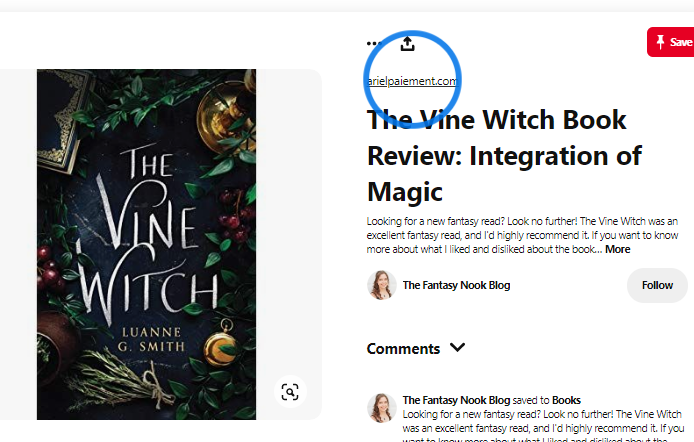
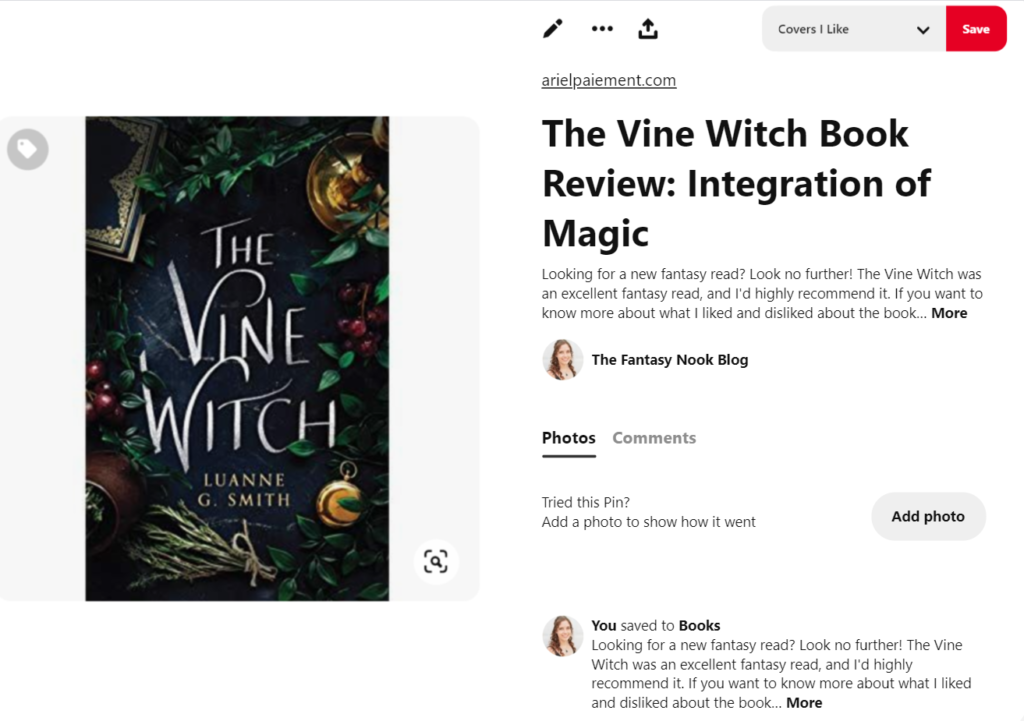
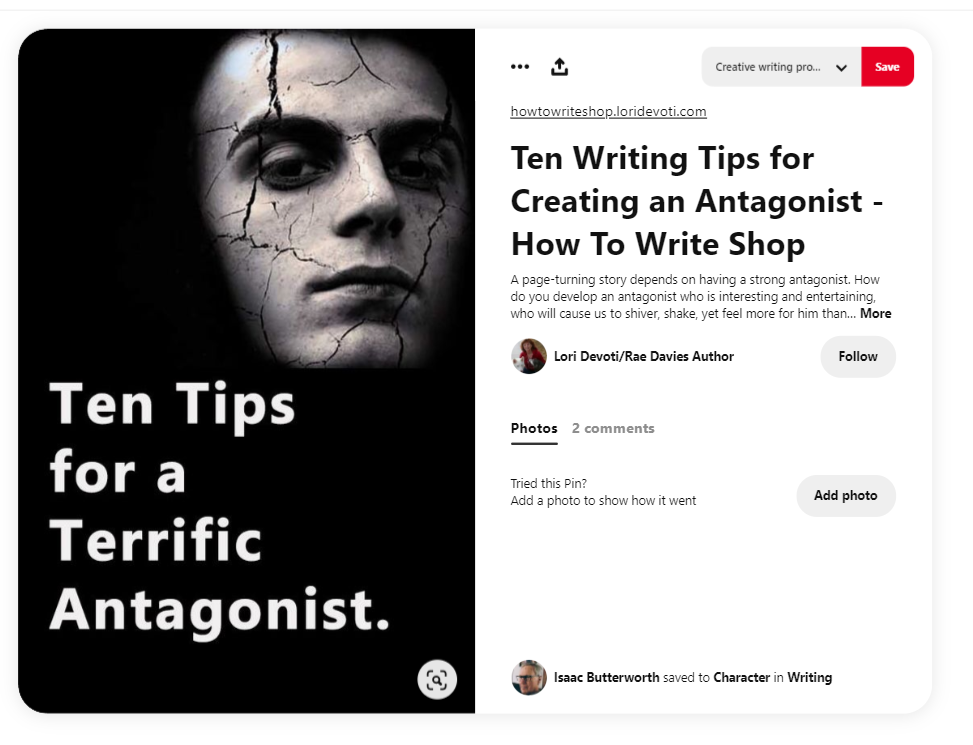
So once
someone has clicked on your search result, what do they see? I clicked on the
Sunday Story Prompt result I mentioned earlier, and here’s what I get.
Now, notice
that this individual didn’t give the Pin a title. Generally, that’s not the
best because as a search engine, Pinterest is going to use your title and description
to show your Pin to Pinners searching for content using your keywords. So don’t
skip the title. If the Pin has a title, you can see that here:
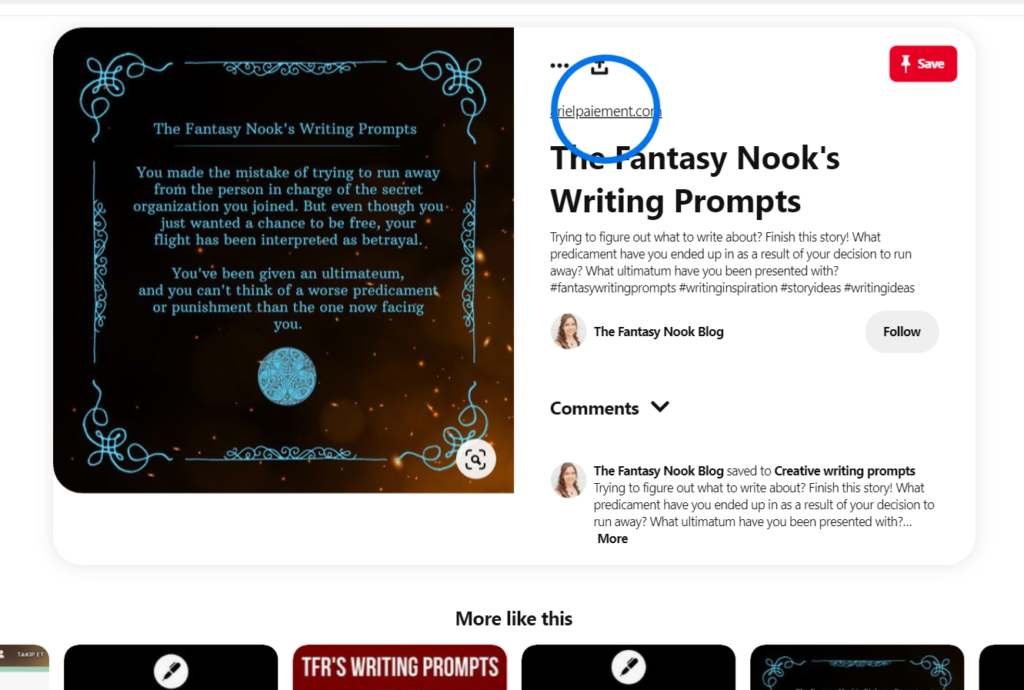
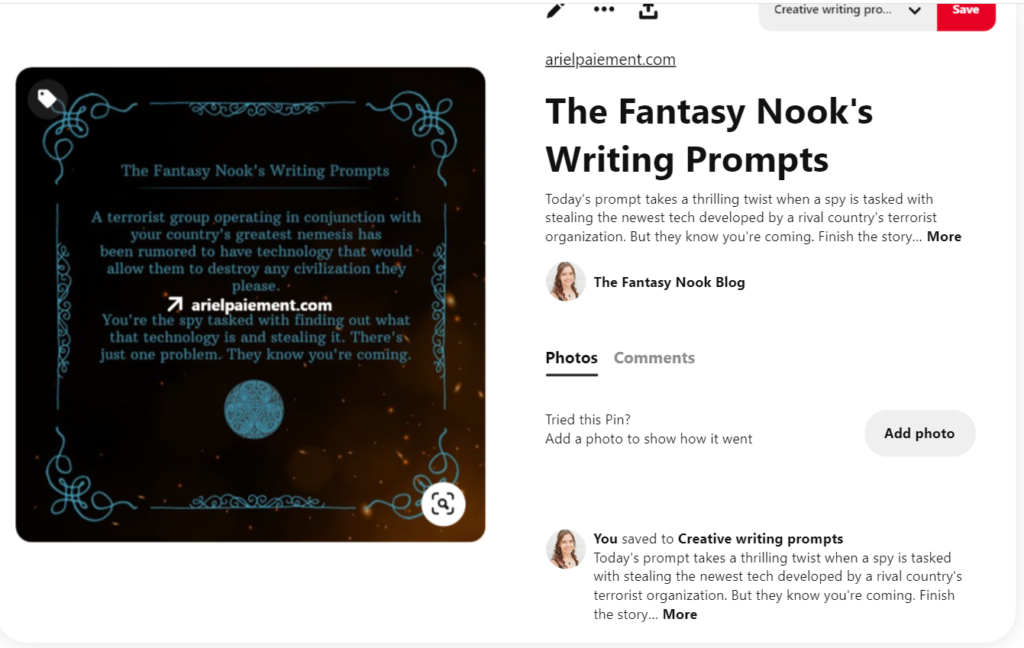
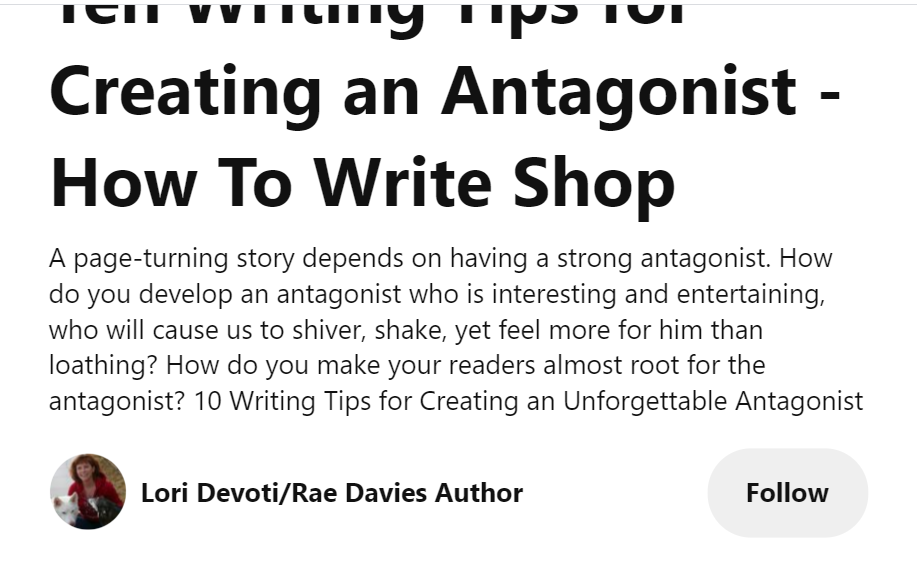
Notice that now you see both the website link and the title of the Pin above the description. The title is the first thing a Pinner sees, and if that isn’t what they were expecting, they might still Pin the content since the image appeals, but they’re probably not going to click the link to go to your blog (which is what you want them to do since Pinterest is meant to be a funnel, not just a fun toy to amuse yourself when you’re bored, right?).
And After the Title?
After they see the title, if that’s still interesting, they’re probably going to look at the description. If the Pin is for an actual blog post, then you should describe what the post will do for them and how it can help them. Include a brief explanation of that and then a call to action (if you’re sharing a product or asking them to do something specific). If you’re not selling a product (Which I recommend you don’t, typically, since Pinners aren’t interested–yet–in buying anything. They’re converted to buyers once they leave the platform, like what they see, and check out what else is available from the Pinner they are looking at.), then your call to action might just be, click the link to learn more on my blog. Super simple.
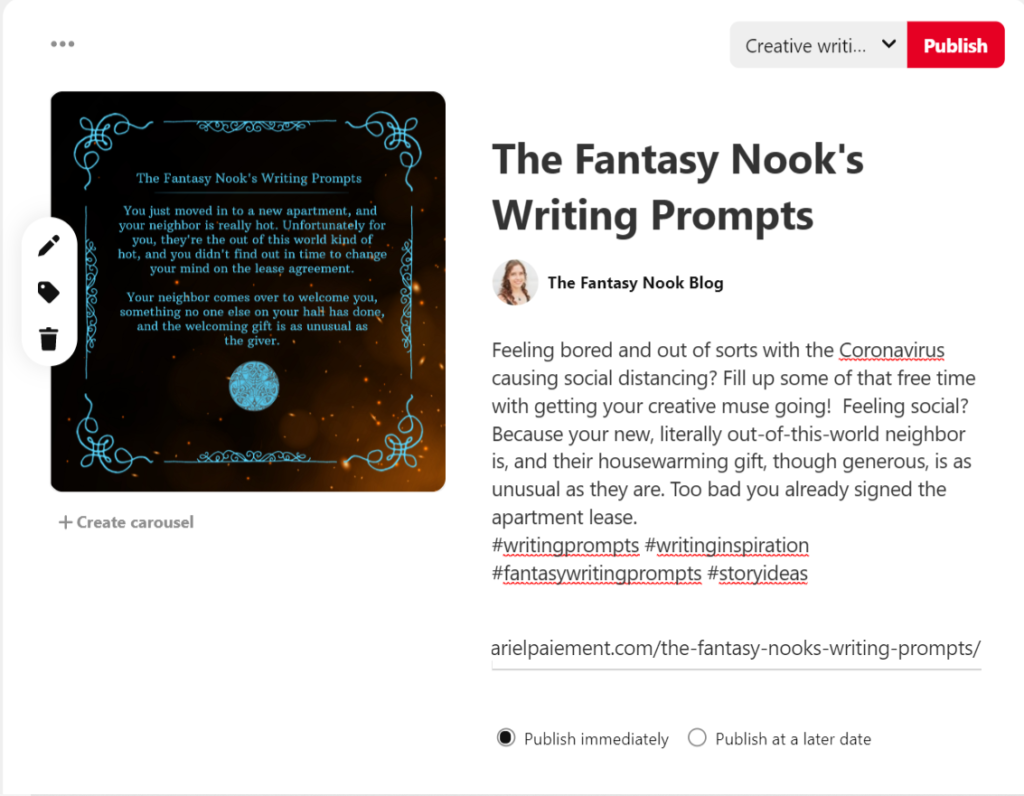
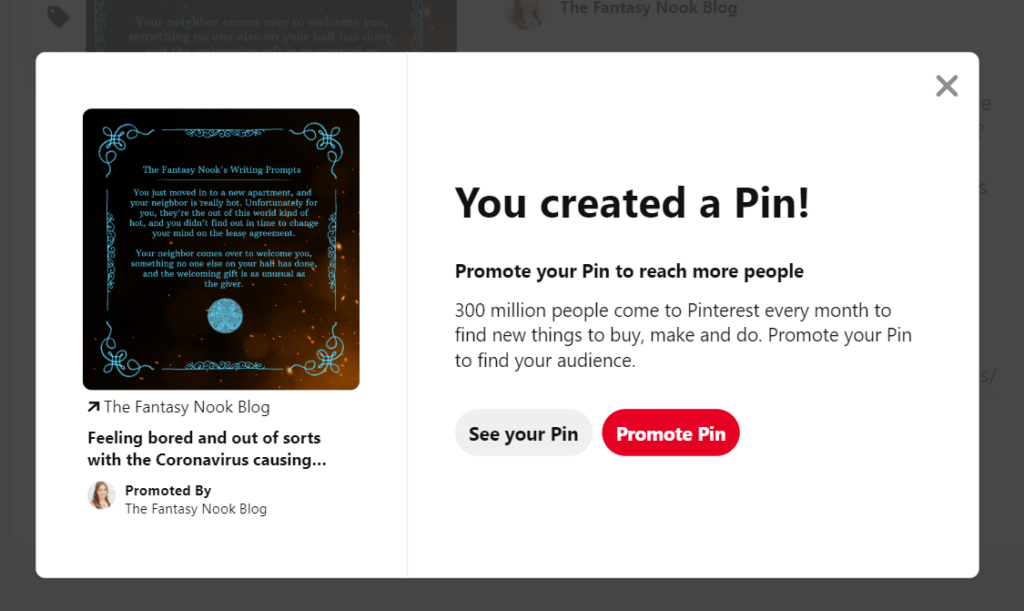
So, this is
what one of my descriptions looks like. This one has no particular call to
action since the Pin itself is really not intended to specifically do anything
beyond what the graphic provides. If your Pin is like that (we’ll talk about
why you might have Pins like this), you can do something like this.
Notice that this includes a few questions to add on to the content I provided in the original prompt. (Ignore the blue circle. My personal account just wants me to click on the link. Pinterest will encourage viewers to do that with outbound links sometimes if they’re newer accounts. My personal one is because I originally converted my personal account to business when I started this. I’ll explain that later on.)
Anyway, the questions I provide ask them if they’re in a predicament of sorts. Then I provide the solution by saying, hey, you’ve got a prompt here, so finish the story. This has in the past gotten me engagement on the Pin in the comments, but not always. Regardless, that’s my call to action. If readers like that, then they’re going to keep reading and, in another situation, may choose to go read the blog article. In some cases, even with Pins of this nature, you’ll get visitors to your blog anyway. I actually do quite often on these Pins in comparison to others.
Pinning It
Last point
before we move to the next section of the article! Once they’ve decided they
like the content, user can choose to Pin it. You can see below that clicking
the save button will give them options to save it to Boards. This is kind of
like saving things to different folders in your bookmarks but more visual since
the Boards will display a certain number of the most recent Pin images saved to
that Board. Quite handy if you want an idea of what was saved to it beyond just
the title.
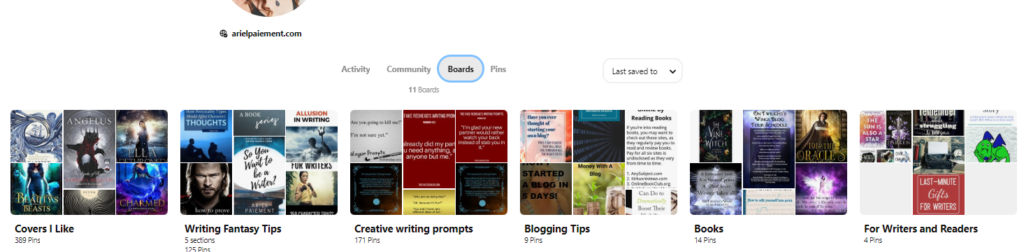
Here’s what some
of my author’s Boards look like.
I’m
explaining all this in case you’ve never used the site because you’re going to
end up doing some of the same things your potential readers and followers will
do. You’ll have to start off from scratch, and that means pinning other
people’s content more often than your own to begin gaining traction.
Fortunately, it’s far easier to do that on Pinterest than any social media site
because a Pin’s lifetime is up to two years instead of the two-or-three-hour
lifetime of most social media postings. So, hey, there’s a reason right there
to start using Pinterest. You don’t have to spend as much time posting and
monitoring, and pinning other people’s content is even easier than creating
your own.
Why Business Pinterest?
Now that you
understand the site’s layout and have a general idea of how people move through
the site, let’s talk about your author’s or blogger’s Pinterest account. First
off, if you already have an account, you can’t just use your personal account.
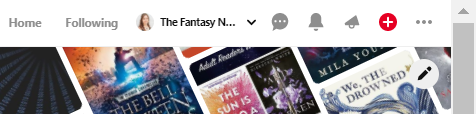
You need a business account to access the analytics, create your own pins, view
stats on the pins, and to connect your website. As you can see, my personal
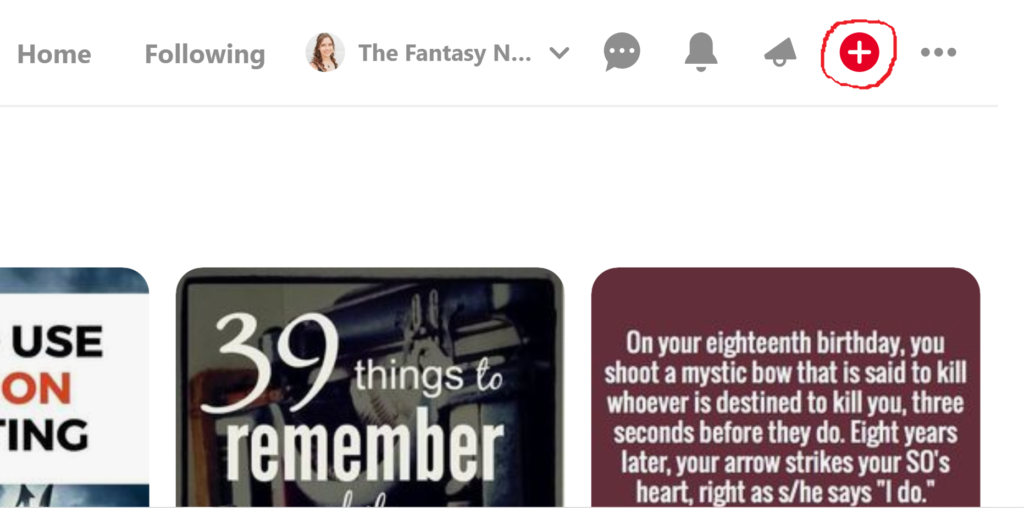
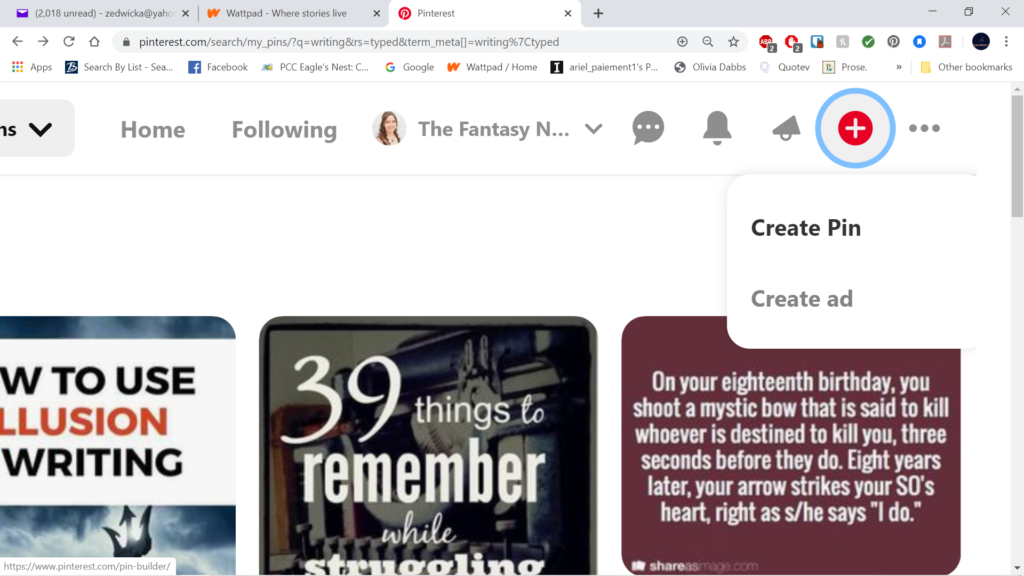
Pinterest account is missing quite a few options that my business account has.
I’ve got a red plus sign for creating pins on my business account in addition
to an announcements section to see what fans are saying on my pins.
So, bottom
line, your blog needs a business account. You can do that one of two ways.
Either you can convert your personal account to a business account (free of
charge regardless of which way you go) and then take down any boards you
created on the personal account that don’t relate to your business or your blog
(so go into the board’s settings and turn it to private. We’ll go over that in
a bit.) or you can create a whole new account and simply choose business
instead of personal.
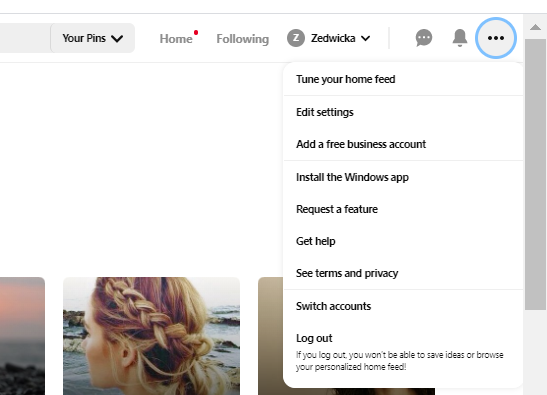
Notice that
in the image below, I’m on my personal account and am given the option to add a
business account under settings and Account Settings. It’s near the bottom of
the screen. That’s where you’d go to convert your own account to a business
account.
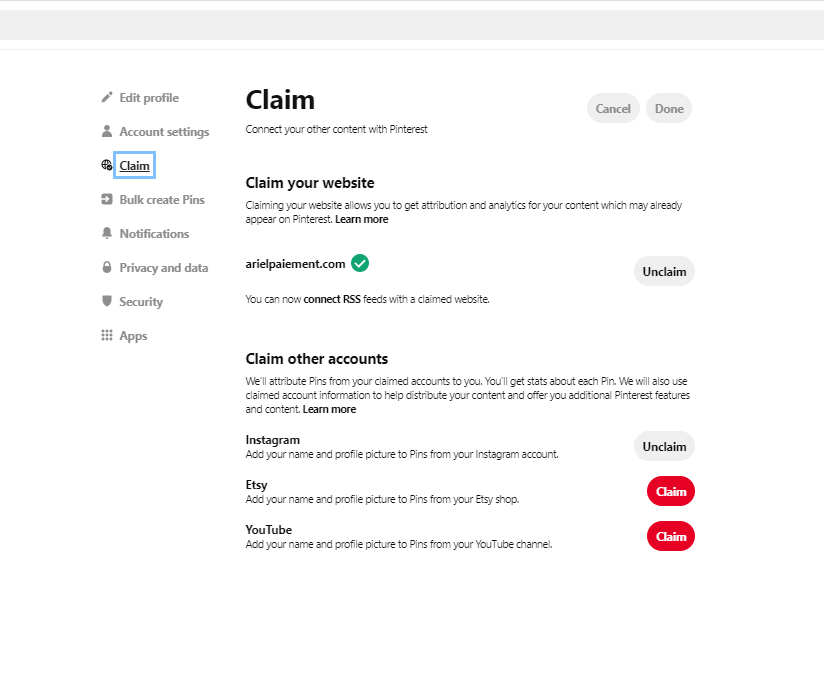
Claiming Your Website and Socials on Pinterest
Once you have that set up, you need to claim your website and any social media links you may have. I’ll show you where to go for this, but note that if you’re not a techy sort of person, you’ll want to get your host site to help you get the two sites connected. I had to get help when I wasn’t self-hosted because WordPress.com is difficult and I couldn’t find what I needed.
Otherwise, Pinterest has an article on it as do other bloggers on the web, and it’s pretty simple to figure out if you follow the steps. If you have issues, you can always reach out to your website host or Pinterest to get someone to walk you through it if you can’t get it working. I’m always having to do that for new features on my blog and site, and I’m sure I drive the support teams nuts when they see my name and the newest problem, but hey… I’m nice about it, and that’s why they’re there.
To claim
your site and social media links, you should go to edit settings and then to
claim, which is just below the account settings tab where you switched your
personal account over to a business account. Here, you’ll see slightly different
options for business accounts. It should look like this:
Notice that I already claimed my website and my Instagram. I don’t use Etsy at all or YouTube (often), so neither of those accounts are connected. But you can connect any of those platforms or social media accounts if you need to. I won’t go into detail on this because Pinterest’s help article on it explains far better than I can.
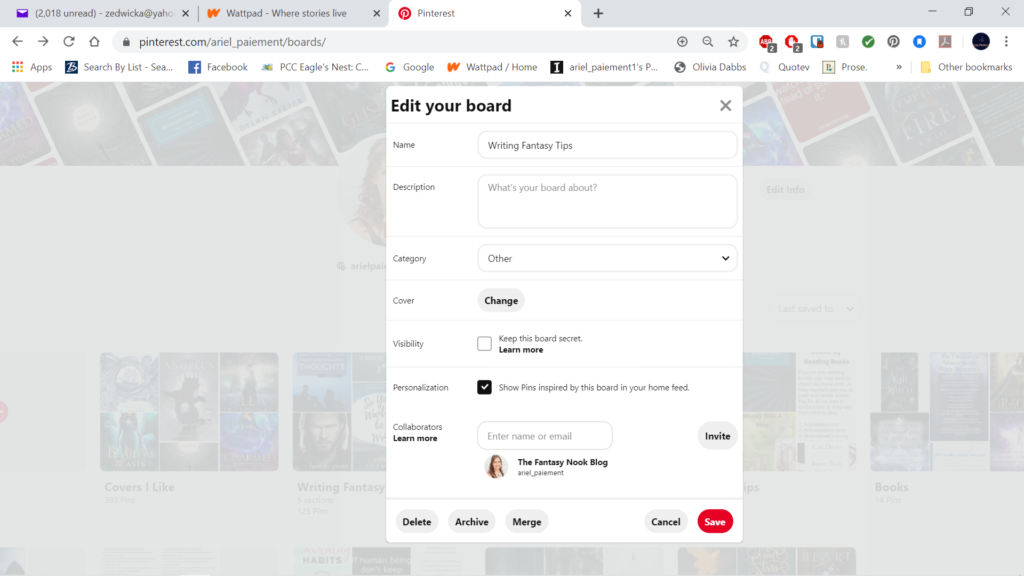
Secret Boards
Once you have your account moved over to business on
Pinterest, you need to go through your boards and delete or hide any that don’t
relate to your blog and business. To be an effective funnel for traffic, your
account needs to be attracting only those who will actually find your blog,
business, and product useful or desirable. Keeping only boards relevant to your
business will ensure that Pinners do some self-selecting on which category they
fall under.
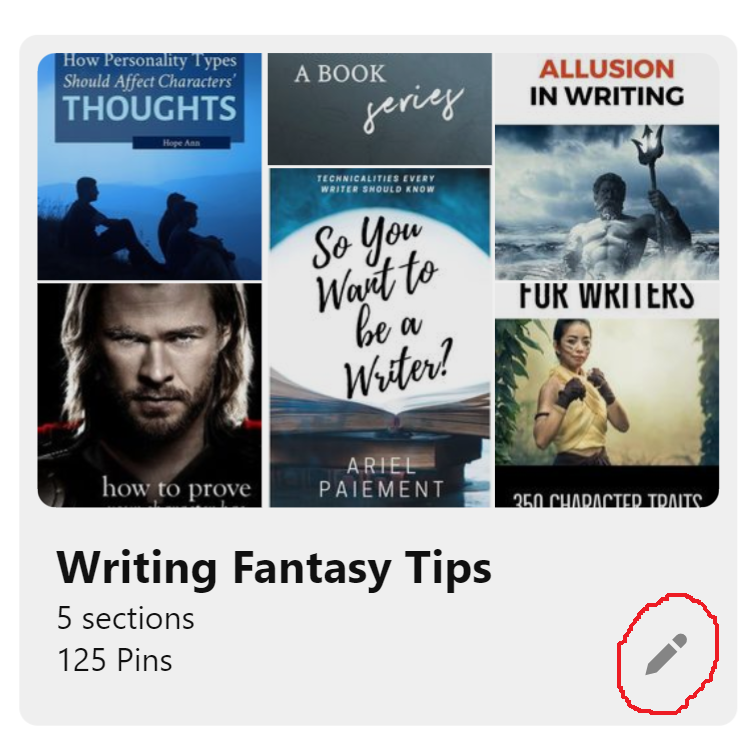
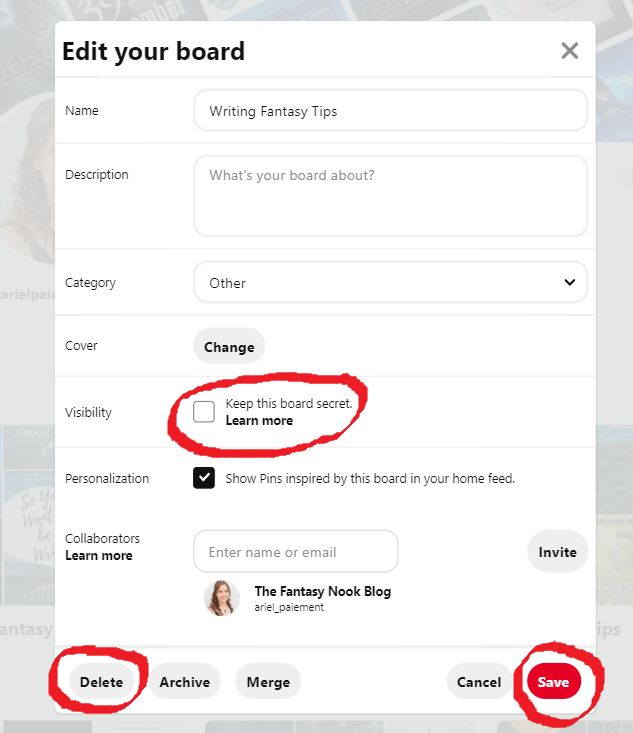
To turn a board to secret or delete it, just go to the board
settings and select one of the two then save or confirm. You can use the images
below to help you find where to do that if you’re new to Pinterest and haven’t
edited a board before. I chose to show the steps on my Writing Fantasy Tips
board. You can either delete at the bottom or, under Visibility, check the box
to keep the board secret if you still want to use it but don’t want others
seeing it. I’ve used this for quite a few of my own personal boards. Just make
sure you save if you decide to use visibility settings to hide it. I should
also note that this is all done from your profile under the Boards tab that I
showed earlier.
So, now that the account is set up, how do you use it? What
do you Pin and how do you create your own content? Glad you asked! That’s what
we’re going to discuss next!
What to Pin
To put it simply, both your content and that of others. But I’m going to talk about content creation a bit later, so let’s focus on what to Pin from others. As stated earlier, every Pin should reflect your brand and business. As an author, there are a few directions you can go.
Start With Your Approach
I’ll explain what I have chosen to do just to give an example, but you should do what fits your blog’s focus and your business’s brand. Every author has a slightly different approach and branding they’re trying to stick to. My way isn’t the only way!’
The Fantasy Nook is focused on providing quality content for
readers and authors. My goal has been to establish myself as an expert in the
market for writing and editing, especially for fantasy in particular, by
providing quality educational material for writers and authors but also by
providing reliable book reviews for readers. I also share short flash fiction
pieces to demonstrate that I know how to use what I preach.
All of this is aimed at establishing in my viewers’ minds that I am a credible source with a high level of skill and expertise in the field.
How Pinterest Ties In
With that explained, how does my Pinterest account show
that? Well, it focuses on writers and readers both, and it has both repined and
original content that centers around book reviews, book-related stuff, editing,
blogging, and writing in one fashion or another. It’s a mix of fun stuff like
writing prompts and reviews to more educational and resource-based materials.
This draws people in because it offers them something that
helps them. In our most recent generations, people buy things advertised or
placed in front of them for one or more of the following reasons:
They’re convinced they need it.
It’s not too expensive, and it’s an impulse buy.
It makes them feel good because it supports a cause they like.
It’s interesting, and they want it.
It fulfills some area of their life that they already needed help with.
Focusing In
Younger generations in particular focus heavily on what they
get out of it. They’re not terribly interested in reason 3, but if it’s one of
the other reasons, then heck yeah! They’re all about that. Reason 2 is iffy
depending on the person, obviously, but in general, your millennials (to some
degree) and your Gen X (to a very high degree) are very concerned with what
you’re giving them. Self-centered? Absolutely. But hey, it is what it is. And
in a business world, unfortunately, you’re not going to go anywhere if you
don’t pander to the way people think and advertise accordingly. Prove to them
that they can use it and can’t live without it, and you’ve got a new customer,
hopefully permanently.
For authors, it’s much more focused on proving to this group
that your book or story is going to entertain them better than something else
or another book. Daunting prospect, but really, it comes down to getting your
product in front of them and grabbing their attention. This group will impulse
buy, depending on the person, and ebooks—even ones in the 2-3 dollar
range—aren’t terribly expensive. Less than a coffee at Starbucks, and it lasts
a lot longer. So for you, your goal with Pinterest should be to get them to do
the following:
Click on the Pin and then the blog
link
Get interested in your content
See your book
Find it interesting
Buy the book not the coffee
Obviously, your blog itself plays a direct role once they’re
off Pinterest, but that’s not the focus for today’s article. At the end of the
day, figure out your goals and the image you’re going for in your brand and
marketing, then go Pin accordingly.
Creating Your Own Content
Elements of Creation – Examples
Pinterest is a visual platform, so your content needs to be some sort of graphic that lets others know what the Pin is about even without clicking. If they don’t know what it is, they’ll keep scrolling. That means engaging images, bold and clear fonts, colors that work well together and grab the eye, and a clear representation of the main idea. Let’s look at a few Pins to see how to do that well and what you should think about.
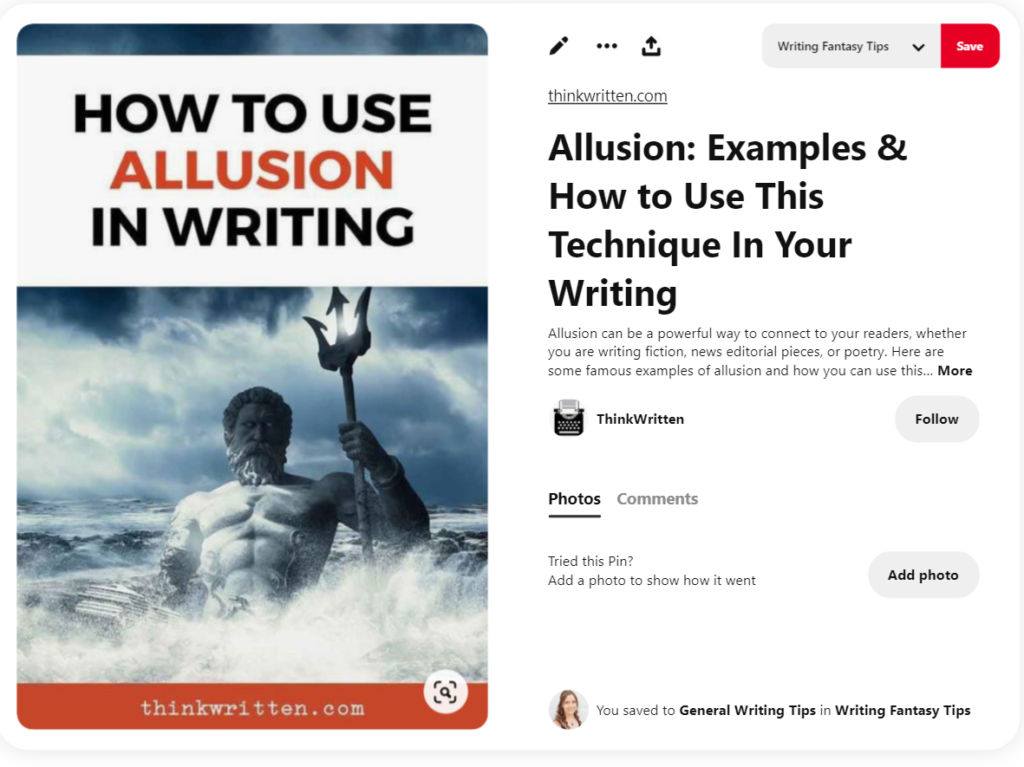
To start off, take a look at these search results. The image is small, but some results stand out better than others. For example, the font on the cover in the first search result is still fairly readable even though it’s small. This was actually one of my book reviews. I didn’t know it would pop up, but it’s the only good cover example here, so let’s use it. For reviews, I only post covers, typically without any sort of other title over the top. I’m trying to highlight the book, not necessarily just a post. Covers are more difficult to see sometimes on small screenshots, but they’re easy to see and admire on a phone or even on a computer, though most people will browse on a phone or other mobile device like tablets and ipads.
The next pin to stand out is the one with orange, blue, and white as its color scheme. You should quickly see the one I’m talking about. It has a big font and can be read even on this small screen. The Pin’s title on the graphic is How to Use Allusion in Writing. It’s a good example of using brighter colors to draw the eye, and it has pretty decent contrast. Maybe it’s not as pretty as it could be, but it does the job, and the colors don’t clash.
The last pin we’ll look at is actually one of mine as well! I didn’t know either of these would show up in my search (writing), but they did, so we’ll look at this one since it stands out from a lot of the other writing prompt pins that are on this results page. (That was intentional too when I created the template I use for these.) Notice how lots of the search results are bland colors with less than appealing graphics? They all kind of blend together after a while, and it’s easy to scroll past them because you don’t have to stop really to read them or think about it.
A Word on Creating Your Own Background Art
What I did with my pin, however, is different. In the
closeup, you can see it has a nice background image (one I know I have a
license for, which is really important when you create graphics for your Pins.
Don’t use Unsplash, Pixabay, or Pexels. There have been issues with stolen art,
and if the pirated content’s poster doesn’t have a license, they can’t give you
one. Even if they do, if they’re not the original owner, they still can’t give
you permission to use it. But I digress.), and the font is in a color that’s
made to stand out. It doesn’t have giant bold font like some of the more
informational posts do, but that’s fairly standard for writing prompts that
aren’t one liners or simple like dialogue starters. You can also see that I
included my blog’s link, and it shows up over the image at first when people
pull up the Pin. This was before I had a special page for writing prompts on my
blog, so you’ll note that I have the link sending people to my homepage,
something I generally wouldn’t do.
I could go back and edit, but I’ve chosen to just leave it
be.
What Else To Include?
Besides the graphic, you need a title, a brief description, and a link to your site. Let’s talk about each individually.
Title
Besides the image, this is the most noticeable part of the
Pin. Name it using keywords that reflect your content.
Description
A good description will, as we discussed earlier, explain
the Pin’s purpose in more depth than your title. It should contain long-tail
keywords—more on that in a minute—and hashtags if useful or relevant. Pinterest
searches using both to give Pinners content most relevant to their search.
Link
If you can, try to avoid sending your viewers to your
website homepage. Instead, show them the content that relates to the Pin. If
you have a post on the topic, link to that and write your description accordingly.
Readers and visitors tend to feel disappointment when they click on your link
expecting read more of what they were viewing only to be sent to a homepage,
or, worse still, a sales page. Unless the Pin they’re viewing is related to
those pages, don’t send them there! They’ll go look if they’re interested.
Otherwise, they’re probably not your target reader anyway, so let them go
without too much consternation.
How to Create Pins
Pinterest makes it really easy to create Pins. Take a look
below to see how step-by-step.
Fill in the page you’re given with the information we already discussed.
Research For Your Pin Description
Now, before you choose a board to publish this to in the top
right corner, you need to take a few minutes to do some keyword research to
find the long-tail keywords that will go into your description. Pinterest won’t
do this for you, but it does make it easier to do than some search engines. You
can find your long-tail keywords and examples of descriptions for content like
yours in the search bar and results. Let’s look at how.
In my search bar, I typed writing. Now, all these other
suggestions come up from Pinterest. These are your long-tail keywords. I’ve
circled the one we’re going to go look at for the next part: finding examples
of content like yours.
I get a ton of results, and I’m going to scroll through them
to find things that look relevant and similar to what I’m trying to Pin. Let’s
say I’m trying to write a Pin description for a Pin about writing your
antagonist and making them terrifying. Okay, lots of stuff shows up in writing
characters that isn’t relevant. So I just keep scrolling until I find the first
one that looks relevant. How about the one below? Looks pretty relevant.
So, I’ll open it up and take a look at the description they used. Keep in mind that I already have my long-tail keyword, or one of them, anyway. We went with writing characters. But maybe this description will help us figure out a better long-tail keyword. If you’re not sure if your idea for the keyword is something people are searching, just start typing it in like I did with writing and see what Pinterest suggests. As long as your search is specific enough, you can look at the top results to see what they’re doing and mimic that (without copy pasting, of course).
Maybe for some reason this one isn’t giving me what I want or I’d like more examples. In that case, I can scroll through the Pins below it in the More Like This section to find other relevant, similar content. That can be helpful for mining keywords that are common to Pins. If they’re near the top of the results, it means they’re doing better, so keep that in mind.
Now, notice that to start, I can’t see what their
description is, but I can see a few keywords in their title, which is another
important thing to notice. They use words like writing, antagonist, tips, and
how to. I might want to use some of those words too. Now, let’s look at the
description up close.
Okay, so we’ve got all the key words in here, a good strong description of what the question we’re asking should be, and the solution. This individual presents first the importance of the topic, then two questions about handling the creation of a strong antagonist (paralleling the topic presented in the title), and gives a solution by ending with the title to bring us back full circle to the blog post (I assume it’s a blog post) that will answer those questions we now have. This is a good pattern to follow, and while she isn’t talking about how to create a terrifying villain after all, and therefore might not be exactly what we need for keywords, she is a good pattern for the structure of our description.
Finishing Up and Publishing Your Pin
Hopefully you’re seeing now how to do the research. Once
you’ve done it, write your description, upload your graphic, insert your link,
and include the title. Finally, Pin it to a board by choosing a board from the
drop down menu in the top right corner of your content creation/pin creation
screen, and hitting publish.
That’s it!
If you choose to publish content of the same type regularly like I do with writing prompts, you can create a background template graphic and change only the text for each new Pin graphic. This saves me a lot of time. In addition, you’ll get used to what keywords, hashtags, and long-tail keywords work best for similar Pins. Check them every so often with the keyword research process to make sure that they’re still trending and current, but in general, if you chose well, they’re going to last a while as long as you’re not buying into a fad.
Does Pinterest Really Work?
What’s the best part of this? You don’t have to touch the
Pin again once it’s up. Aside from checking to see how it’s doing, you can sit
back and let people continue to repin with no work on your part, ads or no ads.
You’ll have to build traffic, but it happens. I started end of October of 2019
and had this by the same date in November a month later (Impressions are your
number of views, engagements are the people who clicked on your post, audience
is who’s looking at any of your boards, and engaged audience is made up, in
general, of those who click on things frequently and visit links):
I thought that was pretty great. Here’s where I’m at to date
with everything. October through to January barely registers. It might as well
be zero in comparison to what I’ve been getting.
This was January 29th to February 29th.
Big difference, right? My peak here is at 16.25k views in a day. I’m usually not below around 1K views in a day now, even though I only post twice a week and Pin others’ content sporadically throughout the week when I think of it. This came from work at the beginning of the account’s lifespan to build my following by pinning content from other users.
At the start, I had hardly any of my own content, and I was lucky to make it to 50 views on any one of them. Now, I’ve got a few pins that are anywhere from 15K to 60K views. It snowballs. Maybe now you guys understand why Pinterest is such a powerful tool. I get more clicks to my website from this than any other platform I use and far more than I ever have seen from social media. This works if you put in a bit of time up front to learn it and play around.
Pinterest Topics
Now, some of you still have no idea what to Pin, so I’m
going to leave you with a few ideas for content that has worked pretty well for
me (some better than others).
Book covers for books you reviewed or liked with a link to the review if you have it on your blog. (These do okay, but they aren’t my highest-viewed posts.)
Writing Prompts (These get the most attention with my highest sitting right around 54K views when I last checked, I believe.)
How-To Pins (Relevant graphic and link to a how-to article. I don’t do as many of these, but I know they work well for many people.)
Informational Articles (Similar situation to the how-to pins.)
Blog Tour Schedules with a link to the schedule on the blog (Mine was my second most viewed Pin to date for On Twilight’s Wings. It got roughly 12K views in a day when I posted it, which was a shock for sure!)
Product-Service related pins (Much like the ones you see when Pinterest shows Pins they’re promoting or brand-sponsored pins.)
Humor related to your blog or those who are in your target audience
Boards with collected images that help readers visualize the world and characters in your books
Inspirational material your audience would find useful
Quotes related to your brand’s audience (similar to humor)
Conclusion
This
was a really long article, and for that, I apologize! There’s a lot to cover,
but I hope that this has been useful to you in some way or another. For those
who have never used Pinterest, I hope it’s provided a crash course that you’ll
be able to use to get started. If you were already using it, I hope this has
convinced you to use it more frequently or to start using it for Business. It’s
a handy tool and it’s free, so why not start today? You’re the only one who
misses out if you procrastinate on it!
Last week, I put up a post on publishing tips and tricks. It was an overview of the most important things to do before your publication date along with some tips on them. Well, now we’re going to go through them one at a time and talk about them in more detail. Today, we’re talking about editing and formatting!
Editing and formatting are two of my favorite parts of the publishing prep process. I know they’re probably not most people’s, but they are mine. And as a freelance editor and editorial designer (interior book designers/editorial designers make the actual book pages between the cover pages look pretty), I’d be pretty miserable if I didn’t! So this is one of my favorite subjects to talk about besides actual writing topics. I’m sure it shows as this is a bit long. However, there’s a lot to cover. I’ve done my best to ensure it’s all useful.
This week, we’re going to do something a little different format wise. Depending on what you guys think, maybe I’ll do these a little more often. But for today, I decided to record the discussion about this instead of writing it out! It’s on YouTube, but I’m embedding it here to make it easy for you guys to view it. If for some reason it won’t load, you can also access it here.
Let me know in the comments if you prefer this format, the usual blog post, or both! If you guys have any questions for me regarding editing and formatting or even about other areas of writing and publishing, feel free to ask! I’m happy to answer the questions or to save them for my next video/post if I’m going to be discussing the topic soon anyway.
Switching gears, we’re going to talk about publishing. Today, we’ll go over the things you need to take care of in order to get your book and its launch prepared for your publication date. There’s a lot to consider and a lot to do, so getting started roughly six months in advance is generally a good idea, especially if you don’t have a lot of extra time to work on things. Let’s dive in.
Publishing Checklist
Item #1: Editing, Formatting, and Proofreading
So, you have your book written, but now what? Before you can publish it, assuming you want it to have its best chance at getting into the hands of your intended audience and doing well, you need to have it edited professionally.
Yes, professionally. Sure, you can self-edit, but here’s the thing. You’re not going to as good a job as someone else (assuming that person knows what they’re doing or is at the same level as you are). Why? Because while you can (and should) take the time to edit your own work, you will always have a certain level of blindness on your own work. As an editor myself, I can attest to this. Editing other people’s work not only takes less time but also goes better. I catch more because, even if I’m enjoying the story, I see all the problems too. The characters aren’t my characters, and the story isn’t my story. So I’m able to keep perspective. We’ll talk more about what you should expect to pay an editor and why you should be willing to pay those rates.
Second, in conjunction with professional editing, you want to either do the formatting yourself or pay someone to do it. If you’re not design oriented, you’ll want to hire someone to do it for the paperback at the very least. Ebook is stricter on what it does and doesn’t allow due to what the ereaders and their programs are able to read. I have an entire post dedicated to ebook formatting if you’re interested in doing it yourself. You can read it here.
Finally, do a last proofread, even if you had a professional editor go over it. This will help you ensure you caught as much as possible. If there were typos, spelling errors, or grammar mistakes, then this would be the time to catch them.
Checklist Item #2: Book Cover
Really, you can have this done whenever, but do know that in order to have the paperback cover copy done, you need to know your page count using the proper page size (based on the trim size you chose through your publishing platform). Hire a designer that has examples of work in your genre. Just because a designer can do a cover doesn’t mean you’ll get an eye-catching one. If they don’t do covers in your genre, then hiring them may not be the best option.
To have one made, make sure that you’ve done a few things.
First and foremost to know with this part of publishing. You need to make sure you have or make sure your designer uses images you have the license for. So no Unsplash, Pixabay, Pexels, or any other free and “creative commons zero” license sites. Yes, they’re free. But you’re highly likely to end up infringing on copyright because these sites do not vet their artists well.
People can post anything and claim it as theirs. There have been issues on these sites with stolen artwork. If the individual doesn’t own it, they don’t have a license. Ergo, neither do you. Even if they have a license, they can’t confer that on you if they’re not the original owner. The same thing goes for fonts, though those ones can be trickier because free for commercial use might not mean free for ebook and print covers (dumb, I know, but it is how it is).
If you insist on using sites that offer free fonts, images, and so on, then mitigate some of your risk by getting in touch with the artist and asking them to confirm ownership (on the image sites) and the rights you have to use it. That way, at least, you can say you did do your due diligence. With fonts, get in touch with the font creator and ask them what you’re allowed to use it for. Tell them what you want to use it for and ask if the license covers it. If not, sometimes they’re willing to negotiate a price for a license if you ask nicely.
Point is, never ever assume that sites with no fees and free images are actually okay to use. If you don’t want any risks, Envato Elements is a good option. It’s a year’s subscription for around 160-200 USD, and you can download as many images, fonts, and other things on their site as you need to. The only thing is, you need to license each download to a specific project, and you can’t keep any unused (or used) images after the subscription expires. Read the instructions for licensing the images carefully though. They’ve got some rules you need to follow to make sure they’re properly licensed for your use.
Checklist Item #3: ARC Team
Next up, you want to gather your ARC (Advanced Review Copy) team. These people, ideally, should be ones who are interested in your genre and have some or all of the characteristics of your ideal reader. When asking for ARC readers, you should make sure you provide the blurb of the book, links for them to go look at the book (if it’s available), and any information on who the intended audience is and what they can expect. Then ask those interested to get in touch if they’ve got questions or want to participate.
Be clear on when the review is due. Give readers enough time to go through the book (I’d give about a month if possible), but tell them the review needs to be in by the deadline agreed on. You can’t force them to review, but if you agree on a date that will work for each individual, you’ll get the reviews by that time most of the time. Even if not, you know when you should be following up with them if you need to. Sometimes this will be necessary. People forget or get behind, and they fail to communicate. So it’s best if you both agree on when you should follow up if there’s no review.
Checklist Item #4: Marketing
This one is one of the trickier parts of publishing, and I could discuss a lot of different options. But I’ll go over some marketing strategies and techniques in more detail in later posts. For now, you should know that you should be utilizing the various outlets available to you.
Social media and Pinterest are free exposure and should be used. It’s not an instant thing though. You need to be active on your social media and Pinterest accounts long before pushing your work . If you aren’t, you won’t have the connections you need with readers and other writers to really make marketing work.
When it comes to publishing, your connections with other writers and reviewers is key. Those you connect with are valuable resources at launch point. It’s a long road to launch, and it would be sad if the book failed from lacking exposure. Your connections give you people to go to when you need people to review the book, share it, and help you out with blog tours should you choose to do that.
Another area of marketing for your upcoming publication is to share it with your newsletter subscribers and on your own blog. Again, however, this only works well if you have an established readership on your blog and with your newsletter.
It does no good if it goes out to people who only subscribed for free stuff and then ditch as soon as you try to “sell” them anything. No matter how nicely you put it, if you’re trying to get them to consider buying something, they’re going to jump ship. However, if your readership is interested in your work, free or otherwise, then you’ll find more success here.
Checklist Item #5: Publishing
Finally, we’re to publishing. If you’re using Amazon, know that you will need to change your browse categories after it’s live (pre-order or actually live) on the site. The options in Amazon’s KDP setup for ebooks and paperbacks represent only 25% of the available categories. However, they’re the most competitive categories available. You’ll need to do research to figure out what categories are less competitive that your book can fit into.
To illustrate how important this is, your categories will make the difference between needing to sell thousands of copies a day to reach bestseller status and needing to sell somewhere between 30 and 40 a day to reach that. For doing this research, I recommend using Publisher Rocket’s free tool for calculating how many copies a day you need to make it into #1 Bestseller category as well as the article they have on changing categories.
Once you’ve gotten your browse categories fixed, it’s time to let people know that your book is available for sale and that your ARC readers can provide reviews any time they’re ready (as long as it’s before the agreed upon deadlines).
Make sure people know not to buy the book until you’ve gotten those categories updated. Any sales you make before go to the generic categories you chose and don’t help your rankings at all. So, make sure you let people know to wait on buying or reviewing until you have those updated if you want the reviews and sales to count.
Conclusion
That’s it for this post! I know it’s been quite long, but I hope it’s been useful. Feel free to ask questions if you have them. I’ll go more detail on some of these topics in the upcoming weeks. Thanks for reading!
In the end, no post or set of posts can possibly cover every detail of world-building and weaving it into your story. Your story will have some elements and not others, and your style will utilize some techniques but not others. This means that, if you really want to grow in this area, you’re going to have to read. Read authors who do this work really well. Find out which authors in your area of speculative fiction (or any fiction) are the best at bringing their world to life, then read those authors. Pay attention to how they do it. Mark up your copy of the book (yeah, I know… Write on a book? Are you insane? Maybe, but taking notes in pencil or underlining the sentences that really bring out some aspect of writing you’re trying to learn will help you recognize what works and what doesn’t. If you can’t bring yourself to write on a book, which I rarely can, then jot notes in a notebook and make sure to keep them labeled.). Whatever you do, don’t spend thousands of dollars on courses on how to do it. You don’t need to! You’ll learn best by example and by seeing it done.
To that end, who do I recommend for this endeavor? First, I do recommend reading through Holly Lisle’s ebook course on world-building. It’s the only course I’m going to recommend, but I highly recommend this just because she’ll teach you so much. You’ll go through tons of exercises, and it’s a great way to learn how to do the world-building quickly while also weaving it into your work. Besides Lisle’s course, I recommend reading Tolkien, Brandon Sanderson, Orson Scott Card, Cinda Williams Chima, Ursula K Le Guin, and Terry Brooks. These authors in varying ways and to differing degrees are phenomenal world builders. Tolkien, Sanderson, and Brooks are my top three authors for this area in fantasy. I’ve learned most from Sanderson’s work, but I learned my share of things from Tolkien and Brooks too. I really can’t recommend these guys highly enough.
All of them know how to bring their worlds to life using many or all of the techniques I’ve mentioned plus some. You’re going to learn what really good world-building within a story looks like if you take the time to really dig into and pull apart these authors’ works. Most of them have paperbacks available for a lot of their books in addition to ebooks, so this is a much more affordable way to learn than taking who knows how many courses. Plus, if you’re like me, you have a tendency to start a course and then forget you were doing it in the busyness of life. Sure, you plan to go back to it, but you somehow never do, and so that’s money somewhat wasted. A book though? I might be slow in reading it, but I usually finish the books I start. It’s not too common that I don’t. So I’ll learn more in a less expensive way if I just try to learn from what great authors did well.