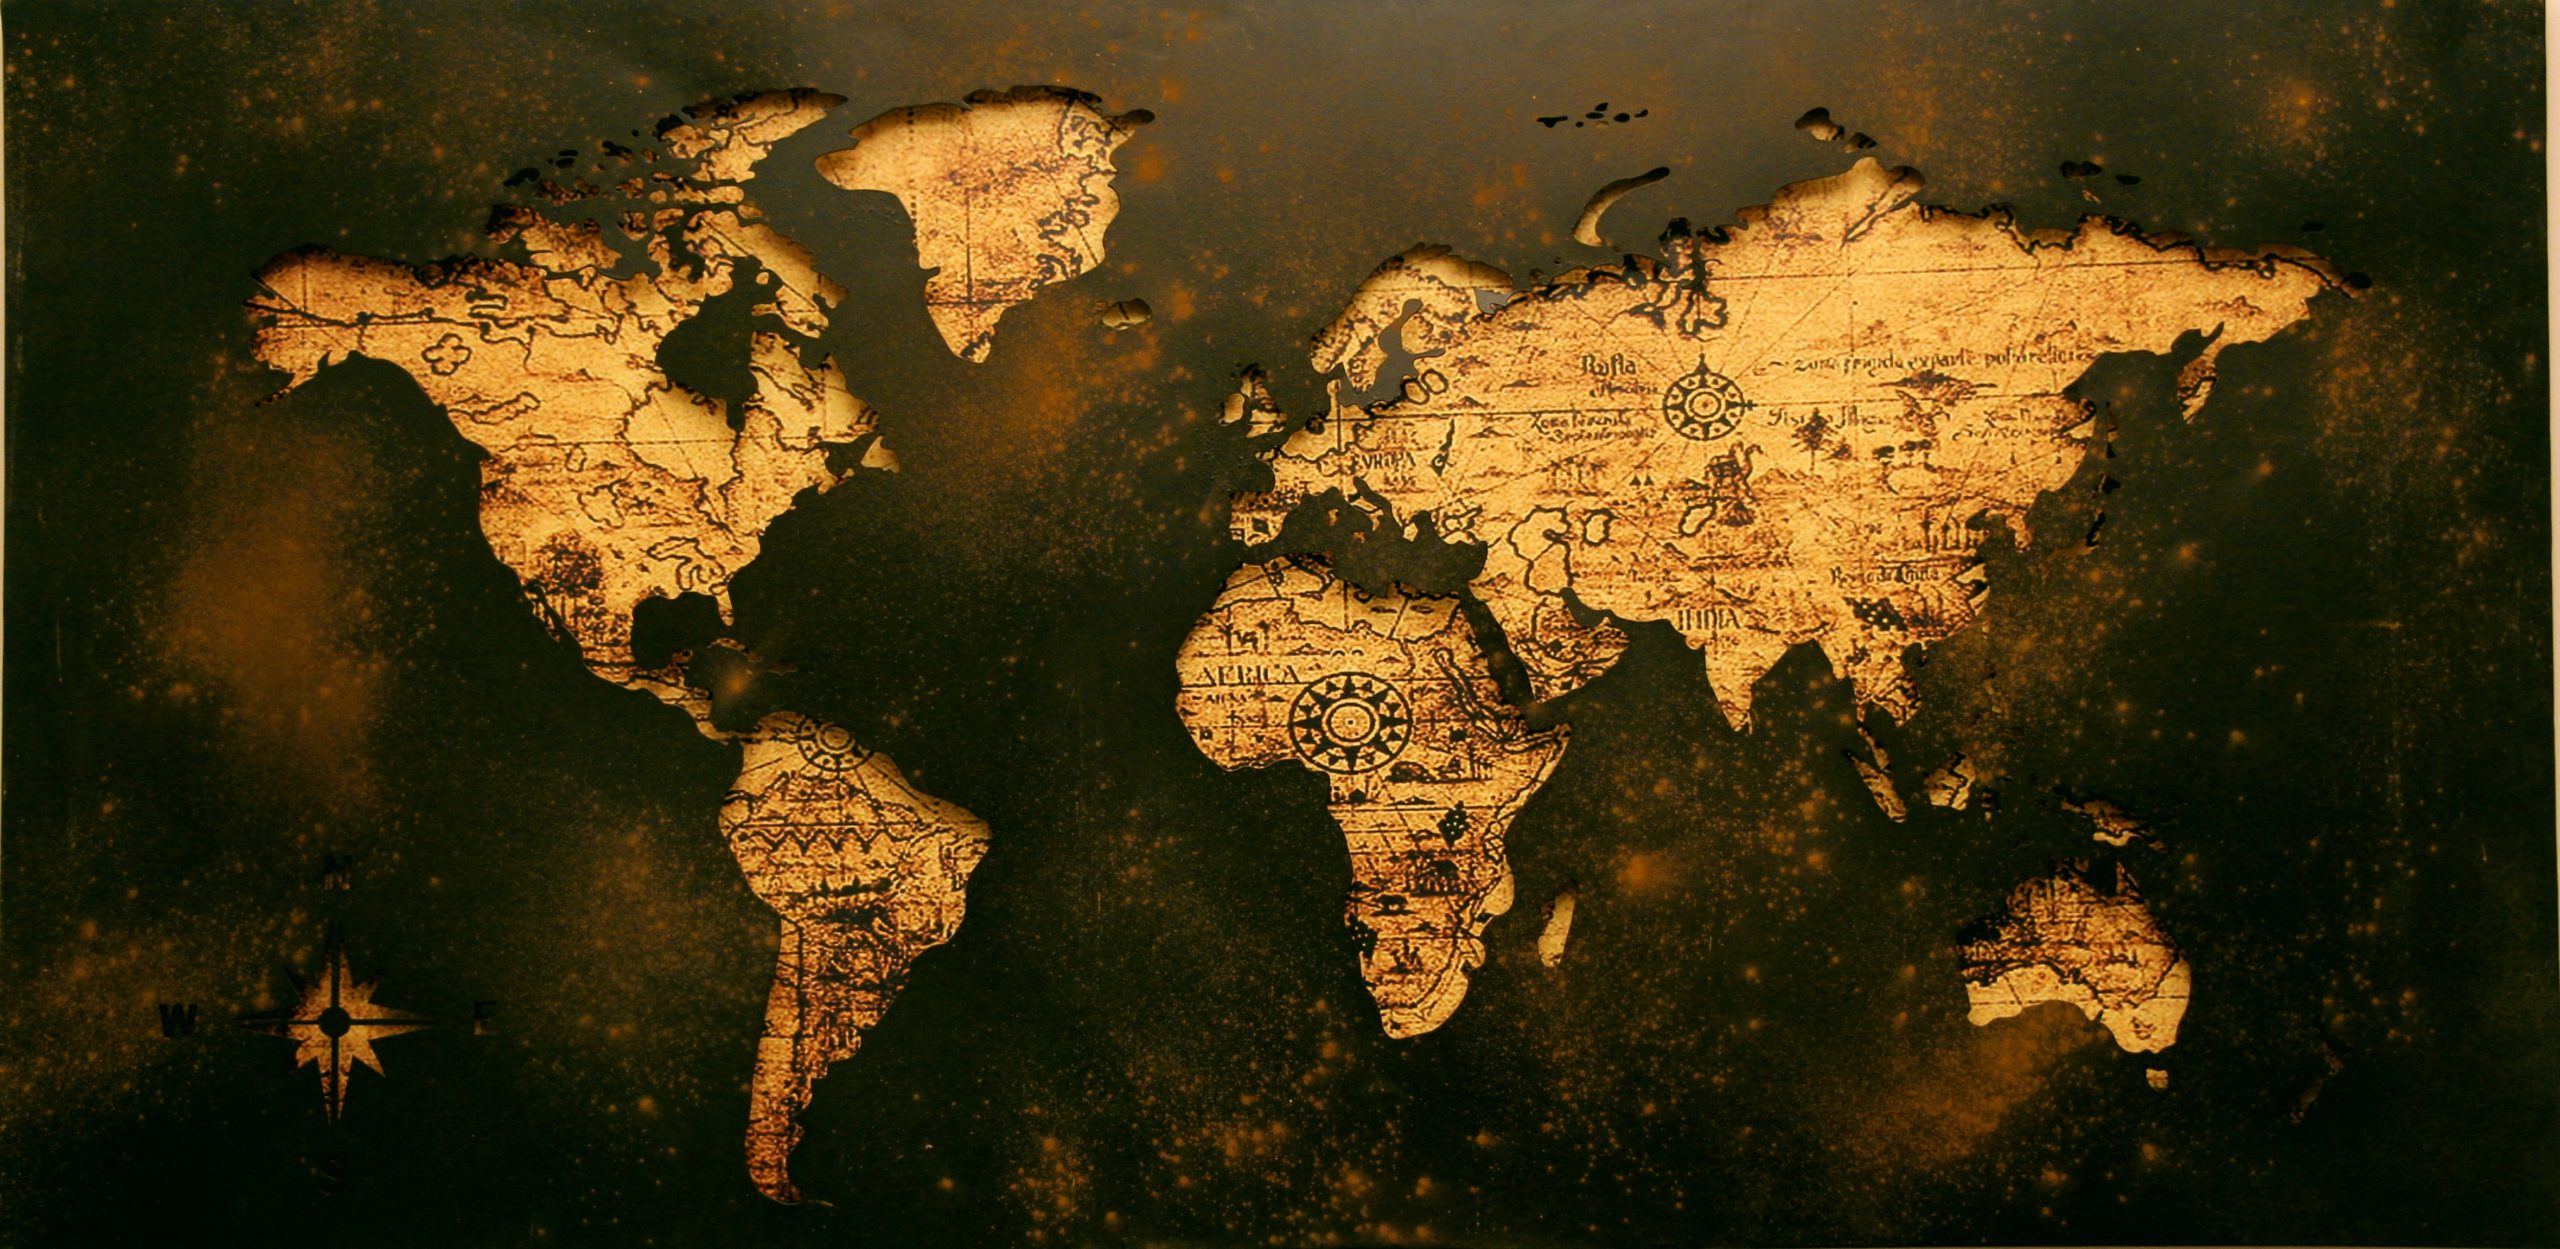
Saturday Setups – Global Mapping: Terrain Features Pt. 2

Introduction

As a quick announcement, the worldbuilding posts will be moving to Saturdays to be a part of the blog section Saturday Setup, which will deal with different aspects of setting up your story world. The posts will, for now, be up every other week, just as they have been so far. With that out of the way, let’s get started!

Last time we took a look at global mapping, we looked at some of the main terrain features of a map. If you haven’t read Saturday Setups Global Mapping – Terrain Features Pt. 1, you should start there since the features you lay down based on that post will affect what ends up happening here. If you’ve already read it, you should be well on your way to creating a working map for your world, and you’re ready for this step.

With your mountains, rivers, and forests in place, it’s time to consider the last part of your terrain. What type of land are you working with? Tundra, foothills, deserts, or rainforests?

Deciding What Terrain Should Be Placed Where

When considering an area of land, one of the more important decisions is what kind of terrain it will be. Should it be a desert wasteland, a swamp, or a sunny lakeside oasis? Much of this will depend on the land features you already placed. If you have a mountain range nearby, the terrain right below the mountain range is considerably more likely to be hilly than it is to be a flat grassland or frozen tundra.

So, how do you decide what terrain goes where? Let’s take a look at the main kinds of terrains and where they’re most likely to occur. Then, you can put these principles into practice and start marking them in on your map. In the resources section, there will be some links to map-making sites to give you ideas for how to mark different types of terrain as you work.

Deserts

Typically, deserts are areas of terrain without much vegetation due to a lack of water. However, they can also form due to salt poisoning or exhaustion of the soil. They can be sandy or stretches of hard-baked ground, bare rock, or even snow.

Deserts are often located on the equator line because, on an Earth-like planet, the flow of warm and cool air causes the dry, arid climate conducive to a desert that’s incredibly hot. These are the subtropical deserts. For frozen deserts, they’re more often located near the poles or in areas of extreme cold (Siberia in Russia is one example of this on Earth).

There’s another factor in the creation of deserts. Mountains. Those ranges of peaks you placed? Yes, those have an impact on where your deserts may be located. While the air pressure caused by warm and cool air at the equator is one cause for those massive stretches of barren wasteland, mountains are another common cause.

But not every mountain range has a desert on one side of it, so how do you decide if yours should? This has to do with the moisture available in the air and the wind flow. Deserts formed by mountains occur due to the flow of wind over the mountains. As air flows up over the peaks, it leaves much of the moisture in it on the mountain peaks in the form of snow.

This leaves the air coming down from the mountain with much less moisture than it initially had, so as it moves further inland from the mountain range, it can end up creating deserts. This is considered the rain shadow of the mountain. If you choose to create this sort of mountain (and it’s likely you’ll have at least a few), keep in mind that it should always be on leeward side of the mountain.

The third kind of desert is a coastal desert. This one is formed when cold ocean currents contact the warmer air to create a dense layer of fog. These deserts may not get any rain, but they’re usually still wet because of the fog that has caused them to be unable to grow vegetation.

Finally, you have interior deserts. These occur far inland in places where moisture-laden wind simply can’t reach. This kind of desert may also lay in a rain shadow in part or whole. The Gobi desert in Asia is one example of an interior desert. It’s hundreds of kilometers from the sea, making it too far away to gain a moisture-laden wind. The Gobi desert is also in the rain shadow of the Himalayas.

Plains

Plains are flat ranges of land that can be grassland, forest, desert, or tundra. There are also flood plains and volcanic plains. I’ve already covered deserts above, and tundra is just frozen expanses of land that could also classify as polar deserts depending on the vegetation level. (Surprisingly, tundra can support a variety of mosses and small shrubs.) However, let’s take a look at the grassland, forested, flood, and volcanic plains.

To begin, let’s look at the most common type seen on Earth. Grassland plains. These plains are identified by the main type of vegetation: grass. Depending on the region and climate, grassland plains can go by a few different names. For instance, the temperate plains in the US are considered just grassland or prairie. These have warm summers and cold winters. But the temperate plains in Asia are considered steppes, since they don’t receive enough rain to grow any tall trees or bushes. Lastly, the subtropic plains in Africa or other regions are called savannas because they’re warm and have scattered trees.

The second type of plain is the forested plain. These ones can occur in many places but are characterized by their variety of trees, shrubs, and vegetation.

Rivers create the third type of plain. Floodplains occur when a river overflows its banks and begins depositing nutrient-rich soil as it does. If the river floods often enough, the sediment can build up to create a floodplain. The Nile River is one notable example of this.

Volcanic plains, the last kind of plain I’ll discuss here, occur because lava has shoved its way up from underground to flow out over the land. This creates land that’s darker than the rest of the land around it, due to the basalt, a mineral found in lava that breaks down into the earth. The soil can be very nutrient-rich and is capable of sustaining vegetation.

Marshes and Swamps

Marshes are wetlands formed on the edges of bodies of water like rivers or lakes. They often help to transition from aquatic to land life. Generally, marshes can grow reeds, low-lying bushes, rushes, and grasses. They’re divided into three categories based on salinity. Salt marshes are the only marshes that are usually only located at mid-to-high altitudes. The other two types are freshwater marshes and tidal marshes, which are affected by the tides.

Swamps, on the other hand, are regions with a mixture of shallow bodies of water and land masses. They move slowly and sustain plenty of bugs and leeches. Many other animals also call the swamp home, and the vegetation that grows there varies widely. Generally, swamps are dangerous areas that should be admired from a distance. Not only are there many dangerous animals, but swamps also contain quicksand or similar features that lead to drowning. Swamps are also considered wetlands and may also be called bogs or, in some cases, salt marshes.

Conclusion

Using this as a guide, you should be able to map out most of the main features needed for your world. Of course, there will always be more you can learn about different types of terrain, but this should be enough to give you a good start. The other features are often found within these main biomes or terrains, making it simple to add them later on the map or on a localized map.

Further Reading

Photoshop Map Tutorial (A good place to start learning to map digitally if you enjoy digital art.)

Mapping trees (Helpful for marking out those wooded plains.)

Fantastic Maps Tutorials (A bunch of random map-making tutorials to help you get started.)
Examples of Map Symbols

Saturday Setups – GLobal Mapping: Terrain Features Pt. 1

Introduction to Terrains

Hey, everyone! I’m back this week with a post on world-building. Today’s post is the first to delve into the global side of mapping, and we’re looking at terrain considerations first. Terrain affects a lot of your world-building. After all, if your characters are living in a desert, their lifestyle will be far different from a character living in the jungle.

Not only that, the distance between various points and the terrain lying between those points will greatly affect things like travel time and how characters choose to travel. What you do with the terrain determines whether it’s easy to find water or difficult to find much needed resources.

With the importance of terrain established, let’s take a look at some of the things you need to put onto your map and work through. Keep in mind as you think about all this that the map you’re building doesn’t have to end up in the front of your novel. It doesn’t even have to be pretty. It just has to be functional so that you can use it for your own reference.

So, on that note, let’s get started.

Mountains

There are plenty of places you could start with mapping, but I recommend you start with your mountains. These majestic features will form the backbone of your world. Where they are placed will determine a great deal about the kind of land (lush and green or barren and sandy), the places where certain kinds of plants and trees can grow, and what types of animals will be found where.

Without being too technical, air flow is changed a great deal when it runs into mountain ranges, and that air current affects everything around it. It even affects how often it rains and how much rainfall an area might get, particularly if the land is close to the mountain range.

So place these first. You can worry about coastlines, forests, and cities later. Those are all important, but not this important.

As you’re placing those mountains, here are a few guidelines you should keep in mind.

First of all, mountain ranges occur mostly where tectonic plates have crashed into each other because land masses were closer than they should’ve been. Some of the mountains in these ranges may be volcanic, but you can have entire mountain ranges with no volcanic activity.

On the other hand, if you have single mountains with no ranges around them, they’re almost guaranteed to be volcanic. This means you shouldn’t place single mountains all over the place. The volcanic activity will have a big affect on everything around it, as you can imagine. Place these types of mountains carefully and with an awareness of what it does to the surrounding terrain and natural habitat.

Using these guidelines, you can end up with chains, ridges, long plateaus, and even circles of mountains.

Wherever there are mountain ranges, there should also be foothills and rugged terrain from where the ranges were worn down and weathered. Make sure you include these in your map for any planning in the later stages. It will change how cities and civilizations in those areas are built.

The last major thing you should consider is the extension of mountain ranges past the places where the coastlines may end up. Mountain ranges often form little islands or peninsulas, so this adds a more realistic feel to your fantasy world. You can use this and sprinkle those features here and there on the coastlines to help add to the believability of the world’s terrain.

Coastlines

The second place to fill in is your coastline. Before you can start mapping out major locations and country borders, you have to know how much space you’re working with. Drawing in the coastlines will help you to do this and will give you a framework to work within.

While working on this step, you should also decide the mileage on your map. In other words, decide how much space your world covers. This will help when you’re working on the global borders between countries, filling in the major cities, and even mapping those cities out on a more localized scale.

As a general rule of them, coastlines are fractal in nature when viewed from a distance. The continents are formed through the sorting of rock and soil by the plate tectonics. The heavier materials are on the bottom and the lighter on the top, which gives the coastlines the fractal appearance you see when looking at the contours of both the coast of a small territory and the coast of an entire continent.

However, there are things that can mess this up. Regions won’t look the same zoomed in or far away when you start including tidal flats or beaches, river deltas, mountains and glaciers (or a combination of the two), flat regions that include shifting barrier islands, or continents that haven’t had sea-level ice in a long time. To better understand how to map these features, if you want to include them in your world, you should study maps of these features on Earth. Understanding what it looks like in the real world and why it works the way it does will help you to develop a system that works for your own world.

However you end up choosing to shape your continents, make sure that the coastlines are–as a general rule of thumb–rough and ragged. They shouldn’t be smooth and pristine because that isn’t true to geographical features or to science. Fantasy may break rules, but even a fantasy world has some sort of plate movement and continental shaping that will be somewhat like ours.

Rivers

Rivers are next up. This is going to play a large part in defining the climate of your world. Plus, water sources are a must for life, and with your mountains and coastlines in place, you’re ready to start placing those rivers where civilizations often spring up.

This might be one of the simpler steps on your map since rivers follow some fairly simple, straightforward rules. And they don’t deviate from these rules unless you get a ton of magic involved. So, here are the rules you need to follow for your rivers:

  1. Rivers flow along the easiest path of least resistance: high elevation to low elevation. Never the other way around.
  2. As your rivers travel toward the coastlines, they will merge. They will never separate.
  3. Rivers going across flat land may change course by creating ever-wider loops. Eventually, however, the loops will pinch off and straighten the river back out.
  4. Rivers in mountainous regions may change course due to blockages or changes in elevation. But they will always find the path of least resistance and follow that.
  5. Rivers provide life to small towns and beginning cities. Wherever you have a river mouth, you’ll probably have some sort of civilization. So, if you know you want a city in a specific location, make sure there’s a fair-sized river close by.
  6. Lakes should only have one river flowing out of it toward the sea, never two. There’s only one lowest point, and that’s where the water will flow. The river may split off later, but it won’t with the lake.
  7. Deltas form when a river carrying sediment hits: a body of water (ie: lakes, oceans, reservoirs), another river that cannot carry away enough of the sediment quickly enough to stop buildup, or inland regions where water can spread out and deposit sediments. Keep in mind that the tidal currents can’t be too strong, or they’ll wash away the sediment.

Finally, the source of the river is important. Most rivers start in a mountain region somewhere since mountains catch a lot of water. However, they may also begin at lakes or in marshy regions. Some may also be fed by heavy rainfall for part of the year and be completely dry for the other part. The key is that wherever the source may be, the river won’t empty into the source as well. It will start at one point and end somewhere completely different.

Lakes

This section is fairly simple as well. Lakes usually form because rivers hit a basin of some sort or were dammed up by something. They may also form as a result of water collection in craters left by meteor impacts, but these sorts of lakes are fairly rare. The largest lakes usually occur because pieces of a continent pulled apart or glaciers carved them.

In cold, rocky regions, there are often many small lakes connected by rivers because the water is unable to carve through the ground and must simply filter from one pool to the next. This causes a tangle of rivers and streams connecting all the little lakes.

In hot and dry regions, you shouldn’t be including any significant lakes unless there’s a large river to feed them. Instead, you’re more likely to end up with salt flats or tiny lakes at the bottom of a dry basin. The lakes are likely to be very salty since they can’t drain off into the ocean. If you do have the river to feed it, the lakes are highly likely to overflow their shores and cause a larger drainage area, so keep that in mind when drawing your rivers in desert regions.

Lakes also shift their boundaries, but when they do so, it’s much more cataclysmic. If they fill or drain too much, they can destroy entire civilizations, so if they shift their boundaries, be ready to include the catastrophes it caused in your world’s history. The historical trauma is fairly common in the earlier stages of a world’s history, but as things stabilize, it becomes less common on a level that would be civilization-shattering.

Forests

The last thing we’ll cover in this post is forest placement. In a following post, I’ll discuss how you can determine where to place hot and dry regions, deserts, swamps, and hilly regions. But for now, this is a lot of information to digest, so I’ll stick to the prominent land features that you need to have a basic map.

That said, what do you need to consider for forests? First of all, forests usually spring up in areas with a temperate climate and ample rain. This means you could have massive forests covering large portions of your map so long as the climate isn’t too cold or dry. You won’t, therefore, see forests in prairie land or areas with a sub-arctic type of climate.

What kinds of trees are growing in your forest depends largely on the region. On Earth, mountains can house fir trees, pine, cedar, oak, dogwood, and a variety of other trees depending on what section of the mountain is being examined and the area the mountain is located.

Of course, on a fantasy world, there are likely species of trees that don’t exist on Earth, so the main goal with those species of trees would be to make sure they have features that will allow them to survive in the climate you’re placing them in. This means you’ll need to do some research on the types of trees and the features that make them suited for one climate or another.

Conclusion

Okay, that’s it for this post! There are a lot of considerations to think about when mapping out your world. As you work, don’t worry about being perfect. The map will be messy. And since it isn’t meant for anyone else’s reference, it doesn’t need to be pretty. If the map is pretty, it will only make it harder for you to trash it and try something different if you aren’t satisfied with it.

So, experiment and feel free to be loose, messy, and spontaneous. Try to be realistic about where you place things, but feel free to try different things, make different layouts, and change things up until you find something that you’re truly satisfied with.

Next time I post about world-building, we’ll take a look at global mapping and some other important aspects of terrain. We’ll also briefly go over the placement of cities and civilizations since you’ll likely want to show the more important locations on your map for your reference. However, I’ll leave the details of mapping the cities themselves for the section on local-scale mapping.

Feel free to share any techniques you like to use for mapping in the comments if you have them. We can all benefit from learning new ways to do things!

Thursday Technicalities – Nonverbal Clues in Writing

Introduction

This week, we’re going to talk about one of my favorite topics in both writing and every day life. Body language and microexpressions. You’re probably thinking, Ariel, what does that have to do with writing? Isn’t that just something for the FBI or movies with super-human characters that act as human lie detectors? My answer: Not at all. And I’m going to show you why.

Why Include Body Language and Microexpressions in Writing?

We’re surrounded by body language and microexpressions every day. Even if we aren’t aware of it, we use these clues in non-verbal behavior to figure out more about those around us. Whether we’re trying to decide if we can trust the new guy or just trying to figure out why a friend seems nervous and down, we use it more than we realize. Some use it more naturally than others.

So, why wouldn’t we include them in writing? Non-verbal body language is such a huge part of our daily lives that it would make sense to include it in fiction. But often, writers without much experience or writers who just struggle with emotionally descriptive writing lack in this area. Adding in the subliminal messaging that body language can provide helps to bring writing to life for the reader. It makes the character feel more like a real person, which is extremely important.

How to Include Body Language in Writing

Of course, as useful as body language is, you also don’t want to overdo. You can end up including more than you should, which leads to writing like this:

Erica tossed her hair over her shoulder and crossed her arms. She rolled her eyes and tapped her foot. “I cannot believe you thought I’d cooperate.”

Daniel glared at her and crossed his arms too. He took a step forward and leaned closer to her. Step by step, he pressed her back against the wall. He locked her in between his body and the wall. His lip curled. “I don’t care if you want to cooperate or not. You’re going to.”

She snarled and pushed at his chest. Her fingers curled into fists against his chest when he didn’t release her or move back. Her jaw clenched. A vein in her temple throbbed.

Okay, hopefully you can see this is certifiably awful. There’s too much here. If you saw this in a published book, you would feel the author had overwritten, right? It isn’t something you’d want to read at all. So, if you don’t want to do this, how can you use body language sensibly?

It’s about giving the reader an image, so sometimes, less is more. Often, if you drop just subtle hints here and there, it will be more effective than using all of the different body language imagery you can come up with. So, here’s a way to rewrite the previous piece to make it cleaner and no longer overwritten.

Erica rolled her eyes and crossed her arms. “You really think I would cooperate with you?”

Daniel took a step forward, his lip curling up. She took a step back, heart pounding. He took another step and then another until she was pressed against the wall, her fingers trembling against the brick behind her. His warm body locked her between him and the wall. She shoved him, but he didn’t budge, and her fingers curled into fists against his chest.

This second example is shorter, but it also uses specific cues to show first defiance, then contempt from the guy, and finally fear and anger from the girl when she can’t get rid of him. But I didn’t need all of the descriptions I had before. So think about the body language you want to draw attention to and make sure that body language will give the reader the clearest image of the emotion you’re trying to paint.

How Can You Learn Non-Verbal Cues to Incorporate Them?

I recommend reading Joe Navarro’s book What Every Body Is Saying and any of Paul Ekman’s work on microexpressions. The first one, in particular, is a good resource for readers who aren’t as into this kind of thing because it’s less about the science behind it and more about teaching normal, every day people how to better understand non-verbal cues. So use his book if you need a clearly explained, non-sciencey explanation of the topic. He’s got some pretty neat stories from his days in the FBI too, and he shares some throughout the book to illustrate his points.

Besides that, there are resources for writers specifically that can help you understand what emotions are associated with which body language displays. You can usually find those for free on the internet. Just know that you should vary up the different displays of body language associated with that emotion because not every person will display the same exact manipulator or pacifying behavior (terms that are explained by Navarro to be comforting behaviors that humans reflexively use when they’re uncomfortable or feel threatened). People may have something specific they do, such as playing with hair or jewelry for women or readjusting a neck tie or playing with a wedding ring for men. Different genders also go about comforting themselves differently when they’re nervous. Women may be more prone to one behavior than men in some situations, while men may be more prone to a different behavior than the women are in another. Knowing the differences can be tremendously helpful!

Conclusion

If you haven’t already, start doing the research on this area so you can better incorporate it into your work. It’s an important area that doesn’t get as much notice as it should. Do you have tips for finding good tips on body language or advice on incorporating it into writing? Feel free to share in the comments below!

Work-in-Progress Wednesdays #40

Lightning

This week’s WIP Wednesday comes from my ONC novel, again, since that’s mainly what I’m working on right now. This piece is from my most recent chapter.

~~~

He frowned. “Viv, hate to break it to you, but unless I’m going mad, nothing’s here. Is Mr. H meeting us here?”

She grinned. “Nope. Come on. We’ve got to go behind the buildings around this lot and under the fence. Follow me closely once we cross the fence line. The field’s an abandoned minefield, and only certain marked paths are safe.”

He sucked in a sharp breath. Wait for it… He’d ask the same things she had when one of the Deixebels had brought her here. He cleared his throat. “What do you mean abandoned minefield? They built this close to something that could blow everyone here sky-high?”

“Look around, Seb.”

He did as asked with a deepening frown.

“What do you see?”

“Run-down apartments that should have been condemned by now.”

“And who lives here, do you think?”

His gaze wandered around the space then returned to her, and understanding lit on his face then morphed to disgust. “All the people the government deemed unfit for a button or a good life. The ones they’d get rid of if they weren’t so useful for all the work no one else wants to do.”

“Precisely.” She headed across the lot, sidestepping debris and trash piles. “They’re citizens just like us, but no one cares if these people die. They’re all slotted for labor camps or execution based on age. But most people in their cozy two room apartments or big houses have no idea these people exist. No one respectable comes here. No one wants to risk ending up like them.”

He made a sound between a growl and a snort. “Are you serious? They just turn a blind eye?”

“You have to understand,” Viv said. “The people here live and die on the government’s whim. Too young to work? You live here with those who are too old for the labor camps or mines. Too old to do that either? You’re exterminated. Who would want to risk ending up like these people? There are rumors, of course, about this kind of thing happening to those who dissent, and even though no one says it, they’re scared they might end up that way.”

“And these people? Did they dissent?”

“No. Most were like you. Too outspoken for their own good, too freethinking. They didn’t dissent. They just questioned. But unfortunately for them, none of them were from the upper class. They were from the lower class.”

His lips pressed into a thin line, and he shook his head. “And they claim they take care of everyone.”

“They do. But some get taken care of in a very different kind of way than others.” She crossed her arms. “The Supreme Council believes they are gods, and gods hold life and death in their hands.”

He scowled. “How can anyone allow this?”

Her gaze fell on a young girl sitting in an alley, her belly distended and her eyes hollow. The girl seemed familiar, and then it struck her. This was the young woman from meeting last week that she’d seen giving her own share of bread away to another little girl even though she clearly needed it. Viv’s heart squeezed. If only she had a chip or two to give or even food if money wasn’t an option. She glanced down at her barely touched coffee. This was all she had, so it would have to do. She hurried over to the girl and knelt in front of her, ignoring Seb’s questioning stare. “What’s your name, sweetheart?”

The girl’s gaze fell on the coffee, and her face lit up with interest. But distrust still lurked in her eyes when she lifted her gaze to Viv’s. “Evia, Miss.”

Thursday Technicalities: Imposter Syndrome

Introduction

We’re going to take a break from some of the really technical stuff this week to discuss a problem all writers go through at some point: imposter syndrome. This is the point where you’ve finished writing something or you’ve published a book, maybe two or three, and you suddenly think something along these lines: 

  • What am I even doing? 
  • No one is going to read this. 
  • Can I even consider myself an author? 
  • All I’ve done is post my book up on Kindle with Amazon, so I probably don’t qualify as a real writer. If I tell people I am, I’m probably lying to them!
  • I’m too young to say this is my career.
  • What am I thinking trying to make money off this? I’ll never make it.
  • No publishing house wanted me, and there must be a reason, so why am I even bothering?
  • Indie publishing isn’t real publishing, so can I really say I’m a published author?
  • My good reviews are probably all coincidence.
  • I’m not as good as a real author.
  • I don’t have enough books out.
  • I got bad reviews, so that must mean my writing is awful.

And so on and so forth. These may seem out there to you now if you’ve never experienced this before, but most of us go through it. These thoughts and questions are ones that real authors and writers I’ve spoken to have said run through their minds, even after they have several or even many books out. It happens somewhere after the occurrence of the giddy feeling of finally being in print or releasing a new book. And, frankly, it sucks. You become your own worst critic and not in any kind of healthy way either.

Addressing the Problem

So, we’re going to talk about a few of the reasons for not believing the lies you tell yourself and about how to handle these feelings when they come up. Let me preface this discussion, however, by leveling with you. If you’re just putting your book out there for your 60 seconds of fame and you aren’t doing any work or trying to really do well, these feelings are merited. Then again, if you’re one of those individuals, you probably don’t feel any of this because you already know all you need to know and have a great book. Sarcasm aside, chances are, if you’re feeling these things, you’re actually doing something right. You recognize that you have areas where you can improve or spots where you’re maybe not doing so well. The problem is, you have to know when there is a legitimate concern and when there is not.

I can’t address all of the thoughts that will run through your mind on this topic, but let’s talk about some of the most common misconceptions that can lead to feelings of inferiority or self-hatred like we saw in the statements and questions above. Some of these may get a little bit blunt or very real in the responses to the issues. You’ve been warned! But seriously, I do address some of these in very real terms with concrete facts to help you to understand how you can combat the false thinking and the lies that plague writers who have imposter syndrome.

1. Indie publishing isn’t real publishing.

This is just plain wrong. Indie publishing IS publishing. Now, it doesn’t have the benefit of the gatekeeping function editors and agents provide, so there’s plenty of junk out there. There are plenty of people who publish just to be able to say they’re published. This has, of course, given a bad rap to those who indie publish, whether they’re one of those individuals or not.

However, you should know that if you’re really doing the leg work, indie publishing is usually just as much, if not more, work than traditional publishing because the author has to find their own editor or edit the entire book themselves, get a cover designer or figure out how to create their own, and be their own salesman. You have to do so many different things and wear so many different hats as an indie author. It’s hard work.

So don’t buy into the lie that it isn’t publishing or that you shouldn’t consider yourself a published author just because you indie published.

More and more people, including many good authors, are going this route because publishing houses aren’t providing them with the support and solid editing framework they need. They turn to freelancers to help them with the areas where they can’t do it, and then they do what’s called going wide (selling on as many online platforms as possible). But enough about indie publishing on this point. Let’s move to the next point.

2. I’m not as good as a real author.

First off, why are you comparing yourself to others in a negative way? Does being better than someone else or worse than them make you more or less an author somehow? No.

Being an author has nothing to do with whether or not you’re better than another author.

In fact, I’ve seen more than enough books from authors published by traditional means that suck. It’s not a pretty fact, but it is a fact nonetheless. Authors both indie and traditional can be bad writers. Unfortunate, but true.

Don’t judge your status as an author based on where you rank in comparison to the authors you grab off a Barnes and Noble bookshelf. (And p.s. Some of the titles you find on a Barnes and Noble bookshelf may actually be indie published books. More and more indie authors are getting their print and digital titles into physical bookstores and their online equivalents.)

Focus on improving yourself and looking at those better than you for new ways to grow and improve your own work. Do not focus on how much you stink at writing in comparison to someone else.

3. Good reviews are a coincidence and bad reviews mean my writing sucks.

Just no… Listen, your book can’t be all things to all people. Unless you’re getting only negative reviews, all of which are saying various parts of your writing like plot or characterization stink, do not assume your negative reviews mean you suck at writing! Usually, they’re an indication that a particular individual did not like your writing. It wasn’t their cup of tea, and they felt the need to tell everyone.

That’s fine.

Same goes for mixed reviews where they say both good and bad things (to be fair, these are the majority of my reviews unless I just loved the book too much to pay attention to flaws). There will always be someone who is discontent with something and feels the need to vocalize it.

Think of it this way. They’ll get rid of readers who will dislike the work for the same reasons. So less bad reviews for you.

Oh, and the good reviews are not coincidence. Just as the bad reviews are someone’s negative opinion about your book, good reviews are someone’s positive opinion about the book. Unless you bribed them to write it, which I doubt is the case, it’s not coincidence. So you should be proud of yourself and excited to see those good reviews come in. They’re honest expressions of someone’s delight with your work. Don’t let imposter syndrome steal the joy out of seeing those types of reviews!

4. No publishing house wanted me, so that must mean my writing is worthless.

Nope. It doesn’t. I mean, maybe it’s true in some cases, but publishing houses are looking for one thing and one thing only: what they think they can sell. For new writers, they add a criteria to that: what they think they can sell with minimal money spent.

Most publishing houses are about the bottom line, not about you. And furthermore, one of the reasons authors are moving to indie publishing has to do with the fact that many publishing houses don’t have the time to really edit or work with a manuscript, so they’ll only buy a manuscript they can pretty much throw into print after a proofread and basic edit.

They’re not going to put resources into an untried author, and many times, they aren’t even willing to do that for authors they’ve worked with for a while because authors move on to the highest bidder. Why develop talent for your competitor?

So, if publishing houses aren’t accepting you, it doesn’t automatically mean your work is trash. It often just means it isn’t what they’re looking for, isn’t something they think they can sell as is, or isn’t something they think they can sell with minimal advertising or marketing on their part. 

5. I don’t have enough books out or I’m not old enough to claim this as my career.

Okay, to be quite honest, this one is a very real concern for many. I’ve felt inadequate due to this one before. But here’s the thing. Age isn’t the determining factor in whether or not you’re a good writer, necessarily. Experience is!

You can have a fifteen-year-old who is a better writer than a thirty-year-old. Why? Because the fifteen-year-old has been working at it for the last five years and has been seriously trying to improve while the thirty-year-old has no experience in writing and is just starting out.

I’ve edited for clients quite a bit older than me before, and I’m able to do a lot to make their writing and their narrative better. Why? Not because I have a super power or am special, certainly. It’s because I’ve been doing this much longer than they have and have far more knowledge than they do in this area as a result. So age shouldn’t be the first thing you look at to determine whether or not its your career.

As for the other issue, you don’t go anywhere if you let yourself become paralyzed because you don’t have many books out. Every author must start with a debut novel and build up from there. Buy into this lie and insecurity, and you’ll be writing books until you’re grey and old but none of it will ever be published.

Publish that first book when it’s ready, and publish another when it’s ready. Have a publishing goal and a schedule for when you want to have things out so you’re consistently building up content, but stop worrying about how much you have out right now. It will build up as you go. I promise!

6. I’ll never make it. Why did I ever think I’d make money off this?

Last one! This one is a huge concern for almost any author. When you don’t see those sales numbers moving and you’re wondering how you can make the sales you need to gain traction, this one’s a really tough one to work around. I’ve been here, and I continue to be here as things don’t do so well at times. It’s depressing to see those low numbers.

But here’s the thing.

Other people have made it.

Not a tiny fraction either. Granted, you may not. Some people just never do, and if that’s what an honest assessment reveals about your trajectory, then fine. Keep writing but find another job you can do to bring in your main supply of income. It’s okay to do that, whether permanently or temporarily. But don’t buy into the idea that you can’t ever make it just because you haven’t yet.

Please know, I don’t advocate pinning your hopes on a pipe dream. I do believe that you should work on this over time. Work a regular job with decent pay while you get it off the ground. Don’t be stupid about how you go about it. But keep reaching for that end goal because people have made it, and if you are able to learn what works well for you as you experiment and work on getting to the goal, you can too. 

Conclusion

Okay, so this was a really long post! But hopefully this has been helpful to you. This is a common problem among writers of every kind, and it’s not talked about as often as it should be. It’s tough to admit our insecurities to the writing community, especially if one of those insecurities is that we’ll be invalidated as a writer.

But it’s also really important to talk about it. It’s important to address the fears we have so we’re not paralyzed by them and kept by success only because we were too insecure or scared to move on. Don’t let that be you!

Thursday Technicalities: Show Vs Tell

Introduction

This week, we’re going to switch gears and talk about something that’s often discussed in the writing world. Show versus tell. Three words that both confuse and terrify lots of beginning writers. After all, it seems that everyone has a different idea of what exactly this means and how to go about achieving this. Not only that, some people say to eliminate all telling while others say some is okay. How do you know what’s right for your work and what the balance looks like? Well, there’s not necessarily a set of hard and fast rules. But before you panic about that, let’s take a look at what can be said about showing versus telling and some of the ways you can utilize it regardless of what you’re writing. We’ll also take a look at some instances where telling is okay. This will be a longer post because I’m going to give examples to make sure that everything is as clear as I can make it.

What Does Show vs. Tell Mean?

Simply put, when you show, you are describing. You’re giving the reader a picture instead of dictating to him what he must, necessarily, see. This probably doesn’t make much sense immediately, and if it doesn’t, I don’t blame you. Those who have been writing for a long time probably know what I mean and have fought the battle of editing for those pesky lines where they didn’t manage to achieve it. That’s just part of the writer’s life. But for those of you who are just starting out or who don’t know much about the technical side of writing, you’re justifiably confused.

So, let’s see if we can’t make this clear with an illustration.

This is telling:

Kendall was nervous.

All you have done here as the author is to state a fact. We now know Kendall is nervous, but this doesn’t necessarily paint a specific image. We can’t determine what Kendall is doing, how the viewpoint character (or narrator) might know such a thing, or why we should believe this to be fact. Aside from the fact that the narrator has stated it, we don’t have any solid footing here.

Compare the example above to this:

Kendall crossed her arms and gripped her upper arms tightly. With each passing moment, her grip tightened. She kept glancing at the clock on the wall, and Darren looked too. Why wouldn’t she stop staring at it? Was his company that disconcerting? She stopped looking at the clock and lifted a hand to toy with the blue pendant dangling at her throat. He cleared his throat to ask her to quit fidgeting, and Kendall jumped, leaning away for a moment before taking a step back with a shaky laugh and a darting glance at him. Did she think he hadn’t noticed her reaction to him? He just wished he understood why she was acting this way.

Okay, so we don’t necessarily know why Kendall is nervous here, but we do know it has something to do with Darren’s presence, and we also know for a fact that she is nervous. But Darren never states it. Instead, he notices the strange behavior she’s displaying, all of which points to her nervousness. 

One other important thing is different between these two samples. I’m sure you noticed that there’s a huge difference in length. Generally speaking, when you tell, your word count will be lower than if you had shown the same thing. Now, it may not be as drastic as what I have here. If Darren were a less observant person, he might only notice how she leans away from him or the darting of her gaze to the clock. He might only see one or two key behaviors that make him think, Wow, Kendall’s really nervous today. 

But we all pick up on clues from the people around us that tell us about what they’re feeling, especially in relation to us or to the other individuals around them. We may not consciously understand what we’re seeing, but we understand subconsciously. 

So, in this particular instance, you can use that to your advantage to show instead of tell. If this were to have been in Kendall’s point-of-view, things would be changed around a bit to leave out Darren’s speculations/questions and insert her own regarding Darren. But you would still show some of the same actions.

Hopefully, you get the idea regarding showing versus telling. You don’t want to overwrite, however. (For example, the passage above would be overwritten unless the character is of the Sherlock Holmes level of observational skill. But this was done intentionally to highlight the difference between the two methods.) Usually, showing is a matter of slipping the description in with a few lines here and there. Let’s go ahead and move on to talking about that next!

How to Show

As mentioned earlier, you don’t want to overwrite when you show. The passage I gave you earlier is definitely overwritten. Part of the problem, of course, is that it’s just straight text. There would, in a real situation, be some dialogue between these two. So let’s look at how I would write a short clip from a scene involving these two and the concept that Kendall is nervous.

Kendall crossed and uncrossed her arms for the fifth time in ten minutes. Her gaze flicked to the clock then back to the floor in front of her beanbag chair. Darren sighed. “Are you even listening to me?”

She stiffened and nodded vigorously.

He frowned and crossed his arms. “I don’t think you are.”Her eyes shifted up to his face and then away again. “I am.”

“Do you know why I’m upset?”She sneaked another peek at the clock behind him. “Have somewhere to be?”

Another shake of her head. She quit looking at the clock and moved to playing with the necklace he’d given her last year on her eighteenth birthday. Now he knew something was up.

A heavy silence fell over them. She shifted in her seat, and he just watched her fidget. Did she think he didn’t notice her reaction to him? Finally, he cleared his throat. “Seriously, don’t you understand why I’d be upset over your behavior?”

She started, her gaze flying to his face, and then she leaned back with a shaky laugh. “I’m sorry for…for showing up late for the party.”

Again, this is longer than it would be if you just used dialogue tags and told us what everyone in the scene felt. But this time, dialogue splits it up and balances out the showing you’re doing. I also removed some of the less necessary details while keeping key details such as fidgeting, playing with her necklace, shaky laughter, darting glances, and crossed arms. These all give off the impression of nervousness and a closed or wary mentality, at least for this current scene.

What if You Aren’t Showing A Person’s Emotional State?

I’m sure the question has now come to mind… What if I need to use showing for something that doesn’t involve a person’s emotional or physical state? Descriptive writing, thankfully, extends into the realm of dealing with the physical objects and settings around us as well. Let’s take a look at another show vs. tell example.

Telling:

The knife was shiny. (Notice that many times forms of the verb “was” show up in telling sentences.)

Showing:

Light glinted off the razor edge of the dagger. (Again, this is longer than the previous version, but notice that this time around, I went straight to writing something that would fit well in a scene. It isn’t overwritten, and it uses vivid verbs to get the idea across.)

You can use this concept to great effect in your writing. By making sure that most of your sentences show instead of tell, your writing will become more descriptive and more engaging. Readers will get a better picture in their minds of what you’re trying to show them in your story, and you’ll get more positive responses to your work.

A Note on When to Use Telling Instead

Sometimes, there is a good call for telling instead of showing. You don’t always have to show every detail. For example, it’s permissible to simply tell us the sky is red. If showing would lead to overwriting or a weakening of the flow, don’t do it. We want good, strong writing, not purple prose that no one wants to read. 

Another reason, in brief, for using telling is that a viewpoint character might not notice all the signs that would indicate a state of mind or emotion in another person. For instance, perhaps Darren from our prior example isn’t good with body language. Maybe he doesn’t notice anything except the way Kendall keeps looking at the clock. That doesn’t tell us she’s nervous, and maybe he doesn’t equate the other actions to anything strange because he just doesn’t notice. If that’s the case, he might not know why she strikes him as nervous. In this situation, you might have to proceed by making a statement like this: Darren couldn’t quite put his finger on why, but something about Kendall screamed nervous. 

If you have to use this technique, do your best to stay in deep POV. (If you haven’t yet, read that article here.) Notice that in the example above, I said “screamed nervous”. Phrases like these can lend to the telling sentence the voice of the viewpoint character and make it seem more like something the character might say if they were, indeed, unsure of why they thought what they did. This is a useful technique to avoid pulling readers out of the present, here-and-now with the character if you have to tell instead of show.

Conclusion

I hope this has helped to clear any uncertainty or confusion for you on the topic of show vs. tell. This is a tough topic, and there’s a lot that could be said about it. I covered the main points for those who don’t know anything about it or who struggle in this area. 

Do you have more tips on how to show instead of tell? If so, feel free to leave them in the comments below! Other writers’ perspectives can often add further levels of understanding and additional insight for beginners, so please pitch in if you have tips!

Thursday Technicalities: Writer’s Block

Introduction

Every writer no matter their skill level has heard of writer’s block and has probably dealt with it too. We’ve all been there, bemoaning our inability to write and wondering why we just don’t seem to have the motivation. And we’ve all spent forever scrolling through blogs and even the occasional YouTube video looking for ways to beat writer’s block.

Depending on who you ask, writer’s block is either a very real problem or a non-existent problem used to excuse laziness. Truth be told, it can be either. Sometimes, you do just need to sit down and force yourself to write. If you’re writing only when the muse strikes, then you’re probably in this category. But if you’re not doing this and you genuinely can’t seem to make yourself sit down and write that next scene or chapter in your current work-in-progress, you may be wondering what to do. It isn’t laziness that’s stopping you. But what is?

The Root Causes

This problem of identifying why you don’t feel like writing or can’t seem to write anything at all is a genuine problem, but it’s a problem that has several root causes.

Root Cause #1: You’ve burned yourself out.

If this is you, it’s okay to take a break. Put the book you’re working on down for a few days and spend the usual time you have for writing on something relaxing. Watch a movie, go for a run, or just do something that helps you recharge.

Then, once you have recharged, do your best to balance things better so you don’t burn out. It’ll be more productive in the long run, and your work’s quality will be higher because writing won’t make you as stressed.

Root Cause #2: Something is wrong with the plot point.

If you aren’t burned out and in need of a break, and you aren’t just procrastinating, then a problem with the plot point is the only other cause for writer’s block. You might be wondering what I’m talking about. You’ve worked out the plot, and you didn’t think there were any problems.

I probably would’ve been with you on the confusion about six months ago. But about that point, I was reading through Rachel Aaron’s 2,000 to 10,000: How to Write Faster, Write Better, and Write More of What You Love. Granted, the book wasn’t about writer’s block, but Rachel did discuss this point, and she made the same point I’m making. I read through her argument and thought, I don’t know if I really think that’s the cause. I mean, it’s an interesting viewpoint, but I don’t think that’s the issue.

Then I got stuck with one of my current works-in-progress. And I discovered just how right Rachel was. I didn’t want to write because I wasn’t interested in what I was writing. And once I worked through it, I came out with something much better and with steps to use for writer’s block in the future.

Simply put, if you’re not excited about writing that section, then you’ve found your problem. After all, if you were happy with or engaged in the plot at that point in the writing process, you wouldn’t be dragging your feet and feeling like it’s plain torture to write a word on the page.

 Unfortunately, this problem isn’t as simple to fix as the others. But there are a few troubleshooting steps you can go through to help fix this issue. These aren’t hard and fast steps, and you may develop your own as you deal with writer’s block. But these are the ones I developed as I worked through this root cause for writer’s block, so I’ll share them with you to get you started.

Before I go into those, however, let me say that the problem with your plot section might not be a logistical issue. By that, I mean that your plot section might fit great with where you want to go. It doesn’t create a technical “error” with the plot. But it still doesn’t grab your attention, and if it doesn’t grab yours, I guarantee it doesn’t grab the reader’s! If you can’t find the interest to write it, chances are you’ll communicate that lack of enthusiasm and boredom to your readers too.

Fixing the Problem

So now let’s look at how you can fix this.

Step #1: Identify what makes the plot point and its corresponding scenes so boring.

Why aren’t you excited to write this? What is the scene or series of scenes missing that would make it a joy to write instead of a drudgery? If you can figure this out, you’re on the right track for fixing it.

Step #2: Figure out if anything needs to change with the plot.

If you’re making changes to the plot point and its corresponding scenes, you may also need to change the way the rest of the plot flows from that point. Not all changes will be drastic enough to necessitate major changes, but it’s always best to double check that the new version of the plot point and its scenes fits fine with what you have planned. Even if it doesn’t, changing the point to make it something that actually holds interest is always the better choice.

Don’t stick with what isn’t working just because you feel locked into the plot or because you feel it’s necessary to get to your ending. If it’s really important for that thing to happen and for the book to end in that way, then find another way to get there that does hold your attention and makes you excited to write. Otherwise, just change things. Don’t be afraid to do that. Better to change it now than to force yourself to write what’s not working and end up with a weaker story in the end.

Step #3: Write.

Once you have things figured out, you should start writing right away. Don’t give procrastination a chance to set in. Chances are that if you’ve already made changes that you like, you’ll be excited to write, so put the momentum to good use. Your excitement over the new scene may mean you faster than usual, so why waste that advantage? Besides, the details you worked out will still be fresh in your mind, so writing the scene should be easier.

But most importantly, starting to write immediately helps to get you back into the schedule and to avoid any further writer’s block as a result of not sticking with your usual patterns of writing.

Conclusion

Those are the three steps you can use to help you deal with writer’s block when it isn’t a matter of laziness or burnout. But above all, remember that you are capable of working through this! Being stuck doesn’t mean you’re a bad writer. Everyone gets stuck sometimes. The goal is just to get unstuck so you can continue doing what you love. And fortunately, all the root causes of writer’s block are solvable. So just keep writing and don’t give up.

Have a solution you use for writer’s block or a question about writer’s block? Feel free to leave a comment!

Thursday Technicalities: Choosing Viewpoint Characters

Publishing Journey

Introduction

Choosing viewpoint characters can be a difficult task even for seasoned authors. For those who are just starting out or who have never delved far into viewpoints and point-of-view, it can be a landmine of problems to navigate: problems that can lead to deadly explosions within the piece they’re working on. Viewpoint makes or breaks the novel, so it’s extremely important to choose the right viewpoint. Let’s get right into it!

What is Viewpoint?

Think of viewpoint like a camera lens. That lens will follow around one character at a time, and only one character. It will shine a light onto their inner thoughts and onto their view of the world as well as what is happening in that world. But it can only do it for one person at a time, so it’s limited in its scope. 

Choosing what that lens shows the reader and who that lens shows them is one of the most important decisions for each scene. If your camera focuses in on someone who’s missing all the action or who doesn’t see the parts of it that move the story forward, the scene becomes lifeless and can’t carry its own weight across the page. So, now that we know what viewpoint is, let’s take a look at some factors that can help you choose which character should be the viewpoint character in the scene.

A Word About Omniscient

Before we get into all of the details, let’s take a look at viewpoint in omniscient POV. In omniscient, as we discussed in the article on point-of-views, you can’t delve into the internal thoughts of any of the characters. Instead, the reader will experience the emotions, thoughts, and behaviors of characters through the lens of an all-knowing, all-seeing narrator. This narrator, then, becomes the frame through which we will see the big picture. He or she will guide us through the world, showing us what we need to see and telling us about important things in clever or intriguing ways. 

Because of this, your viewpoint in omniscient will remain the narrator’s throughout the entirety of the novel. While you may show your reader what various characters think or do, they will not be the viewpoint characters because the narrator is telling us that’s what they thought or did.

Who is Central to the Scene?

This is the first in a series of questions to ask yourself about the scene you are writing. Who or what is central to the scene? The answer may be that several characters or animate objects/sentient lifeforms are central to the scene. If so, that’s fine. This question alone doesn’t necessarily contain the answer to your ultimate question, but it is the first layer in the onion that is your question.

So how does answering this question help? Well, your viewpoint character should always be important to the scene. The character should never be just a side character that’s observing for the heck of it. They should be integral parts of the scene in some way or another, though those ways may vary.

What Does the Character Reveal in the Scene?

The second question to ponder regarding the characters you listed above is this: what do these characters tell you that you don’t already know? If the scene were in their point-of-view, would it move the story forward? Would we gain as much from it as we would if it were told in someone else’s perspective? If so, then that character is likely not the best fit for your viewpoint. 

A scene should always tell us something new or move the plot forward in some way. Preferably, it should do both. If a character can’t help you toward that goal as the viewpoint character, they have no place in that role. They’ll only bog down your story, so strike them from your list.

How Does This Connect to the Bigger Picture?

The final question you ought to consider is how this will factor into the bigger picture. Will your viewpoint character’s revealed information or forward motion weave into the story seamlessly to provide the reader with hints and nudges toward the ending? Does that character work alongside the other viewpoint characters to draw us deeper into the story until we finally come up for air at the end? If not, then this character too would make a poor fit, even if he or she made it through all of the other stages. 

Results

At this point, you should have several very good candidates. Chances are you may only have one character who made it through all of the stages. If so, that’s the character you should use, assuming you were honest with yourself in previous sections. 

But if you still have a few characters left to pick from, go with the one you feel fits the scene best. Choose a character you find easy to write or one that, in your gut, you know fits in with the people and the mechanisms involved in the scene in question to move the plot and the characters forward. 

Conclusion

This may seem like a lot of work, but in reality, it often takes me only a minute or two to decide who should be my viewpoint character in a scene once I have the character established and know the story. Knowing the process and what questions to keep in mind when answering will speed up the process, even if at first it takes a little while to think through everything.

The main takeaway, besides the questions, is that this is entirely possible and can be achieved by even beginning writers. It takes some thought and some preparation ahead of time, prior to writing, but it isn’t impossible. You might never have thought about viewpoint before now, but that’s the good news for you. You can learn it and get to a point where you choose the viewpoint character correctly the majority of the time.

Have a question or another tip on how to choose your viewpoint character? Feel free to leave it in the comments.

Thursday Technicalities: Deep POV

Introduction

This week on Thursday Technicalities, we’re going to discuss writing in deep point-of-view. This point-of-view, really, is more of a viewpoint to write from than it is a literal point-of-view, and as such, it can be used with both third, first, and second person. However, it works best with first and third person since those are the ones that readers have the easiest time acclimating to. So let’s take a look at it.

What is Deep POV?

Deep POV involves an entire shift in viewpoint and perspective as a writer. It requires you to go deep into your characters’ minds to understand how they talk and how they think. Why? Because deep POV is, at the heart of it, writing the scenes in the voice of the character. This is relatively easy to do in first person because it naturally lends itself to this, but it’s much harder to do in third person. However, it makes a huge difference in the writing.

Writing Deep POV

With deep POV defined, let’s go over how to write it. To begin with, let’s take a look at the difference deep POV makes. We should know what it looks like before we go into how to write in deep POV.

Consider this example before it’s written in deep POV:

“Orian couldn’t believe they’d asked him to do this. If he’d known what was at stake, he thought, he wouldn’t have done this. He never would’ve gotten her involved either. Now, with the betrayal in her eyes fresh in his mind, he found it was all he could think of. He couldn’t think of the fact that he’d won or the fact that his masters were pleased. He could only think of those bright blue eyes full of pain and disappointment.” 

Now consider the same paragraph, but in deep POV.

“Why had they asked him to do this? He never should’ve done what they said. Never would’ve if they’d told him what was at stake before they’d sent him here. He clutched at his chest. Those bright blue eyes invaded his mind, his very being. He wouldn’t have gotten her involved either, really, he wouldn’t have. But it was too late. With the look of betrayal in her eyes filling his head, he had never hated himself more. That anguish cut to the quick. What sort of pleasure had duty brought? None. Pain and bitterness were his only companions now. That and the galling pleasure his masters took in his success. But what was that worth? Nothing. Not when he’d lost her. Not when the disappointment and despair in her eyes was all he could think of.” 

See the difference? In the first, the narrator tells us about what Orian is thinking and feeling. In the second one, we see everything through Orian’s eyes, and he tells us what is going on. Something worth noting about deep POV is that it often results in longer writing, not just richer writing. The nice thing is, though, that even though it leads to longer pieces, readers are still willing to read it because deep POV has an effect that pulls the reader right into the story as if they themselves could be the character.

Now, let’s go over some of the key things you need to keep in mind in order to write something that’s deep point-of-view. 

Key One

To begin with, the first key to writing in deep point-of-view is to let your author’s voice disappear in favor of the characters’. You aren’t writing about your viewpoint character. You’re writing as them. Therefore, don’t use words or phrases that remind the reader of the author’s presence. These are filter words like: heard, smelled, notice, feel, know, or noted, among others. If a character is telling us the story in the immediate moment, they won’t tell us he heard the birds chirping. He’d just say the birds are chirping. Here are a few examples of how this works:

Third-Person Limited before Deep POV

Horace noticed that the woman was unusually tall.

Deep POV:

The woman was freakishly tall.

Third Person Limited (Before Deep POV)

Angelina felt he couldn’t get much worse than he was, but somehow, she thought, he had managed.

After Deep POV:

He couldn’t get much worse, but somehow he had managed. Angelina shook her head.

Key Two

The second key ties into the first, and that’s the voice you use as you’re writing. Since you’re writing in deep POV, each scene must be written in the voice of your viewpoint character. This means that if you have a character who speaks British English, then you would use phrases and lingo within the narration itself that your viewpoint character would use. Let’s look at an example of how this works out with a character who is a bit more of the backwoods hillbilly character. 

Written outside of deep POV:

He couldn’t believe she’d just said that. She should know that sort of thing wasn’t acceptable here. If she’d said it to anyone else, he thought, she’d be sent out of town with a gun barrel to her head. But, here she was with a smile on her face, expecting him to just overlook her behavior.

Deep POV:

She ain’t kiddin’, is she? The girl had been sniffing around enough to know that kinda thing wasn’t going to fly around here. Anyone else woulda marched her on outta town with a gun to her pretty temple. But here she was,  with as pretty a smile as could be on that fresh face of hers, and just waiting for him to smile back. Crazy city girl.

In this version, you can see that not everything is formal or even “grammatically” correct, but you get an immediate idea of the voice of the character. 

Key Three

The final thing we’ll discuss on writing deep point-of-view has to do with explanations. Sometimes, it’s okay for a character to explain something. But many times explanations become extraneous and end with the character explaining to themselves something they already know. For example:

Rowen eyed the buck. If he didn’t hit it just right with the arrow, it would ruin the meat. Then his mother would be angry with him for failing to bring back food for the night.

Okay, so if Rowen is a hunter, even if he isn’t the best hunter, he already knows he needs to hit the deer just right or risk ruining the meat. He would also already know that his mother will be angry. So, here’s the deep POV version.

Rowen eyed the buck. Hit it just right and they’d have dinner. He leveled the bow and smiled. The best part was the way his mother’s eyes would light up when she saw him dragging this buck into camp.

Here, he isn’t explaining anything that he already knows. Only reflecting on the information in brief in a way that anyone might do. This is really important in writing in deep POV because no one explains things to themselves that they already know, so you have to find ways to write it that avoids that.

Conclusion

Alright, everyone! I know this is a long article, but hopefully it’s helpful to everyone. If you have questions or other things you want to add that you’ve learned about deep POV, please feel free to share those in the comments! I have also included some links below for additional reading on this subject because it’s a huge subject and not something this article is able to cover completely.

Well-Storied

The Editor’s Blog

Thursday Technicalities: Choosing Your POV

Introduction

Last week, we discussed the different options for point-of-view, and this week, we’re going to go over how you choose one. This can be a bit of a struggle for many writers because the options offer widely varying strengths and weaknesses in some cases. This means that you need to assess your story to determine what point-of-view will really allow you to give the reader the fullest experience possible. By assessing the strengths and weaknesses of each point-of-view option, you will be better able to choose one to fit your needs. So let’s get started!

First Person POV

To start with, let’s look at first person. The obvious strength here is that you get to see intimately inside the character’s head and his/her heart. The character will be the one to tell the story and show us the world that his/her story takes place within. This is great when you want the reader to be close and personal with a small cast of characters. It’s usually suited well to one or two viewpoint characters who switch off, though some authors have used it for more than that.

The downfall of first person pov is that you can’t show us what is going on inside the minds of anyone except the viewpoint character, the “I”, in the chapter. Typically, to avoid confusing readers, you need to stick with one viewpoint per chapter in first person because changing becomes too hard to follow in most situations since both viewpoint characters would be referred to as “I”. To avoid throwing the character out of the novel, you want transitions to be seamless, which usually necessitates using chapters as the break for changing viewpoints instead of scenes as you do in third person. First person can also limit your cast because having too many characters to follow when chapters are the break off point for a new viewpoint. It isn’t that a larger cast is impossible, but it is difficult, so most writers avoid it with this point of view.

Second Person POV

As mentioned in my previous post, second person is really best suited to choose your own adventure novels or similar styles of writing. It doesn’t fit well at all with most other writing because readers will, at some point, find themselves unable to suspend their belief in order to enjoy the book. The weakness of this writing, then, is the fact that it addresses the reader and forces them to be the character, which may work fine if the reader relates to everything the character does. The minute they don’t, they’re going to struggle to keep reading and are, most likely, going to quit reading.

Third Person POV

This option has a few strengths. First of all, it allows the writer to have multiple viewpoints in a chapter. Because third person can easily differentiate between characters if the writer has done a good job with the work, it isn’t necessary to wait to change viewpoints until the beginning of a new chapter. A scene break will work fine. The other major strength is that it allows for a larger cast of characters. You can fit more of them within a chapter to show what’s going on in various places, so novels with a lot of characters and a large scope of events in varying locations are usually better suited to this POV option. It’s also strong because it gives room for not knowing why a viewpoint character did something. If you need to keep it secret, it’s much easier to simply write a scene in another viewpoint character’s perspective than it is to write the whole chapter in the other character’s perspective to hide an intent from the reader.

However, despite those strengths, third person does have the weakness of distance. It isn’t as close to the character as first person, and so readers may feel shut out of the character’s head at times, which could cause problems for relating with that character. Good writers can work around this issue with internal dialogue and other techniques, such as deep pov, which will be discussed in a later article, but it still falls under the weakness category.

Omniscient POV

Last, but not least, we have omniscient POV. This one’s biggest strength is the fact that it allows for a third party as the narrator, one who is seeing everything and knows everything but is not in the story. This allows a writer to give readers a much fuller picture of what’s going on than they might otherwise receive in another POV. Of course, the issue with is that you sacrifice the ability to delve into any one character’s thoughts. Instead, the narrator must tell us that Sally thought Jim was a nuisance or that Justin found Pete to be a tolerable roommate. This POV’s strength lies in the fact that it allows for some very interesting commentary and a humorous effect, in many cases, but it sacrifices the closeness with the characters in exchange. It also means the author must keep the entire narration in the voice of that narrator, not the voice of the author or the character. That can be exhausting, and it forces the author to constantly check to be sure they aren’t including anything unnecessary. Readers won’t have a high tolerance for extraneous information, so the author has to be sure that all commentary fits with the story without bogging it down. The author, then, is the filter for what is and is not important, not what the character would or would not know.

Conclusion

Hopefully this has been helpful to everyone!  If you have other strengths and weaknesses for these viewpoints that you can add, feel free to leave them in the comments! Have a question or a suggestion for a future Thursday Technicalities post? Leave that in the comments as well or send me an email at arielpaiement@gmail.com. I’d love to hear from you!